
Main Courses
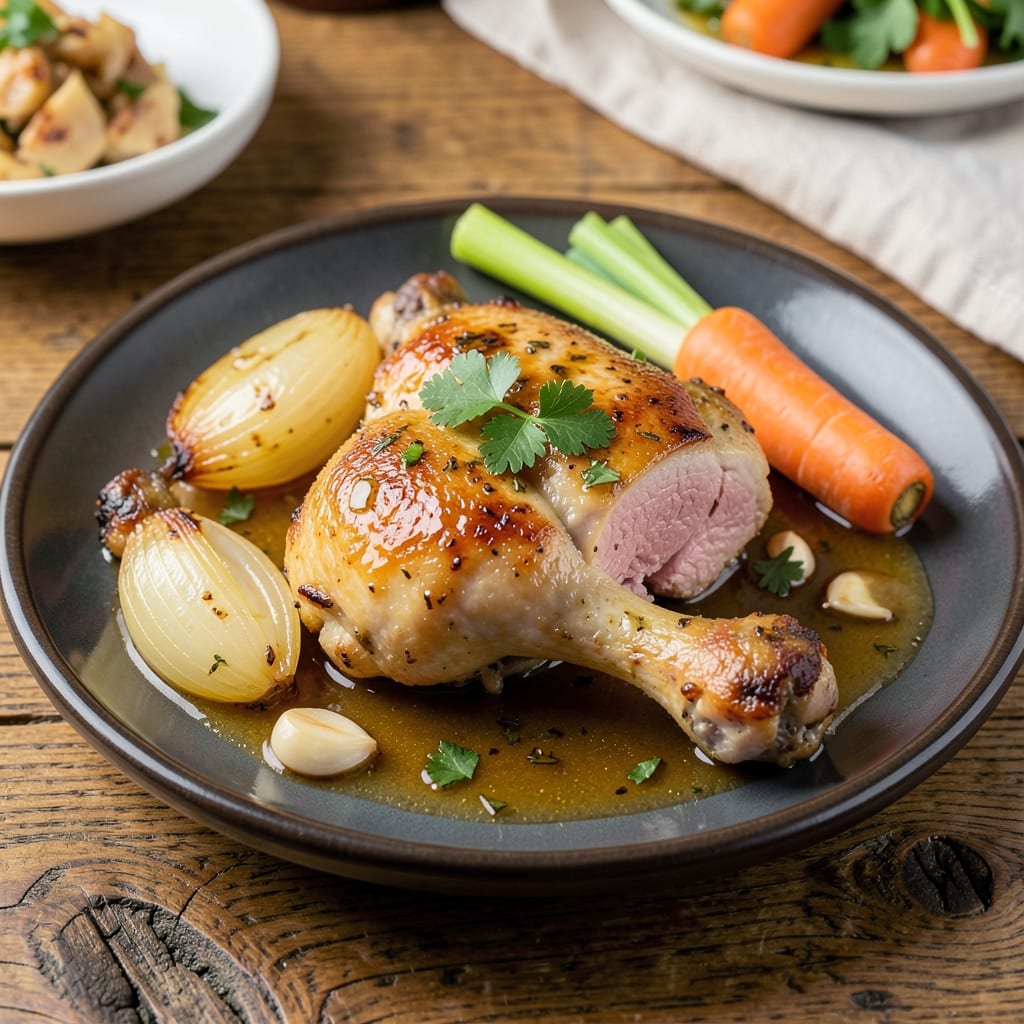
Boiled chicken thighs deliver juicy, tender dark meat that's surprisingly flavorful when cooked low and slow. I remember my first attempt years ago—dry, rubbery thighs that tasted like nothing but disappointment. The secret? Proper seasoning and broth infusion transform simple boiling into a restaurant-worthy technique that's foolproof for home cooks.
This method starts with a simple brine that keeps the meat moist, followed by simmering in flavorful broth until the thighs reach 175°F internally—a perfect balance of tenderness and moisture. The broth absorbs all the natural juices and seasonings, creating a versatile base for soups, stews, or even sandwiches. Unlike roasting, boiling preserves every bit of moisture, ensuring each bite stays succulent.
By the time you pull these thighs from the pot, you'll have meat that's tender enough to fall apart with minimal effort, all while maintaining that rich, dark meat flavor we love. The broth becomes a bonus—packed with flavor and ready to elevate any meal. This is comfort food at its finest, with minimal effort and maximum reward.
Perfect for meal prep, family dinners, or feeding a crowd, these thighs reheat beautifully and work in everything from salads to tacos. The technique is simple but delivers restaurant-quality results—no fancy equipment required. Let's get started on making juicy, flavorful chicken thighs that'll impress everyone at your table.
Ingredients for boiled chicken thigh
Simple ingredients that transform boiled chicken into restaurant-quality comfort food.
| Ingredient | Amount | Notes |
|---|---|---|
| Chicken Thighs (Bone-In) 🍗 | 2 ½ lb | Skin-on for crispiness, trimmed of excess fat |
| Large Yellow Onions 🧅 | 2 whole | Quartered, skins on for color |
| Carrots 🥕 | 4 medium | Whole, unpeeled for natural sweetness |
| Celery Stalks 🧄 | 4 whole | Trimmed, cut into 2-inch pieces |
| Garlic Cloves 🧄 | 6 cloves | Smashed, skins left on |
| Chicken Broth 💧 | 6 cups | Low-sodium preferred, homemade if possible |
| Bay Leaves 🌿 | 2 whole | Dried, standard size |
| Salt 🧂 | 1 ½ tsp | Diamond Crystal kosher salt |
| Black Peppercorns 🌶️ | 1 tsp | Freshly cracked, not ground |
| Fresh Thyme Sprigs 🌿 | 4 whole | Stems intact for easy removal |
| Fresh Parsley 🌿 | ¼ cup | Chopped, for garnish |
| Lemon Wedges 🍋 | 2 whole | For finishing, juice reserved |
The chicken thighs are the star—bone-in, skin-on for maximum flavor and moisture. Look for thighs with good marbling (that white fat streaked through the meat). Costco or local butchers often have the best quality at reasonable prices. If you can't find bone-in, use bone-in chicken drumsticks instead—they're cut from the same muscle and work perfectly. The aromatics (onions, carrots, celery) are non-negotiable for building flavor—this is classic mirepoix technique. Fresh thyme and parsley elevate the broth, but dried will work in a pinch (use half the amount).
No fresh thyme? Dried thyme works at one-third the amount. Running low on chicken broth? Vegetable broth plus 1 tbsp soy sauce mimics that umami depth. The carrots and celery can be swapped for other root vegetables—potatoes add creaminess, fennel brings a nice anise note. For extra richness, add 1/4 cup heavy cream or coconut milk at the end. The bay leaves and peppercorns are simple but essential—they infuse the broth with subtle earthy notes that make all the difference.
This broth reheats beautifully—simmer gently to avoid skin forming. Store in airtight containers for 4-5 days in the fridge or 3 months frozen. I always make extra broth—it's perfect for soups, rice dishes, or even as a base for gravy. The chicken thighs keep well too, but use them within 3 days for best texture. For meal prep, portion the broth into smaller containers and freeze individual servings—thaw and reheat as needed.
Why You'll Love This Recipe
- Foolproof Simplicity: I swear by this recipe because it’s the kind of meal that lets you multitask—no hovering over the stove. Toss bone-in thighs, onions, carrots, and celery into a pot with garlic, cover with water, and let it simmer. That’s it. Even if you’re the kind of cook who burns toast, this forgives mistakes.
- Deep, Savory Magic: The secret’s in the bones and the garlic—juicy, tender thighs with a broth so rich it’ll make you want to drink it straight from the pot. Onions caramelize just enough to add sweetness, while the celery keeps things bright. It’s the kind of flavor that turns a basic meal into something special without any fancy tricks.
- Weeknight Workhorse: Between us, this is my go-to for busy nights, potlucks, or when I need to feed a crowd without stress. The thighs stay moist, the veggies soften perfectly, and the leftovers? Even better the next day. I’ll often repurpose the broth for soups or grains—zero waste, all flavor.
- Budget-Friendly Powerhouse: Bone-in thighs stretch my grocery budget further than skinless breasts ever could, and the veggies add bulk without breaking the bank. Honestly, I make this twice a month just because it’s reliable. Plus, the bones make the broth richer, so you’re basically getting two meals in one. Smart, simple, and satisfying.
Step-by-step instructions for juicy boiled chicken thighs
Here's how to transform simple ingredients into tender, flavorful chicken thighs with a rich broth infusion.
Prepare the Chicken and Aromatics
Start by trimming any excess fat from the 2.5 lb chicken thighs, leaving about ¼ inch of skin for crispiness. In a large Dutch oven or heavy pot with a tight-fitting lid, combine the quartered large yellow onions, whole medium carrots, trimmed celery stalks, and smashed garlic cloves. This aromatic base forms the flavor foundation for both meat and broth.
Add the 2 whole bay leaves, 4 whole fresh thyme sprigs, and 1.5 tsp salt to the pot. Gently stir to distribute the seasonings evenly among the vegetables. The thyme sprigs should be whole so you can easily remove them later without straining the broth. This preparation ensures every bite of chicken absorbs the rich, layered flavors from the vegetables.
Simmer the Vegetables and Broth
Pour in the 6 cups chicken broth and bring the mixture to a gentle boil over medium-high heat. Once boiling, immediately reduce the heat to maintain a steady simmer at medium-low heat. This controlled temperature prevents the vegetables from breaking down too quickly while allowing their flavors to infuse into the broth.
Let the vegetable mixture simmer uncovered for 15 minutes. You'll notice the onions soften and the carrots begin to develop a tender texture while still maintaining their shape. The celery should release its natural sweetness into the broth. This initial simmering step creates the flavor base that will penetrate the chicken during cooking.
Add and Cook the Chicken
Carefully add the prepared chicken thighs to the pot, skin-side up. The thighs should be completely submerged in the broth. If needed, you can gently press them down with a wooden spoon to ensure full immersion. Cover the pot with the lid and bring the mixture back to a gentle simmer over medium heat.
Simmer the chicken for 40-45 minutes. The thighs are done when they reach an internal temperature of 175°F and the meat easily pulls away from the bone with minimal resistance. The skin should be tender but still intact, not falling apart. This cooking time ensures the connective tissue breaks down, resulting in that signature juicy texture that defines perfectly boiled chicken thighs.
Finish and Rest the Chicken
Once the chicken reaches the proper temperature, remove it from the pot using tongs and transfer to a serving platter. Tent loosely with aluminum foil and let it rest for 10 minutes. This resting period allows the juices to redistribute throughout the meat, preventing them from escaping when you cut into the chicken.
While the chicken rests, remove and discard the thyme sprigs and bay leaves from the broth. Stir in the 1 tsp freshly cracked black peppercorns and squeeze the juice from the 2 lemon wedges into the broth. The lemon adds a bright finish that cuts through the richness of the chicken and vegetables. Serve the chicken immediately with the flavorful broth ladled over the top and garnished with the 0.25 cup chopped fresh parsley.
Pro Tips For Making Boiled Chicken Thigh
- PARBOIL FIRST: Start the chicken thighs in cold water—yes, even if you’re eager to boil. After 5 minutes, drain and pat dry before adding back to the pot with your veggies. This guarantees even cooking and keeps the meat from turning rubbery when you finally simmer it with the aromatics.
- CHOP ONIONS THICK: Slice those yellow onions into ½-inch chunks, not thin rings. Thick pieces hold up better during the long simmer and release flavor steadily instead of dissolving into the broth too soon. (I learned this the hard way when my soup turned watery mid-cook.)
- DON’T SKIP THE SKIN: Leave the skin on the thighs—it’s your secret weapon for juicy, flavorful meat. After boiling, crisp it in a hot pan for 2 minutes per side (yes, even if it’s not perfect). The contrast between tender meat and crispy skin makes all the difference.
- USE A LITTLE FAT: Add 1 tablespoon of oil or a knob of butter to the pot when you return the drained chicken. It creates a light barrier that prevents the onions and carrots from sticking to the bottom and burning. (Your future self will thank you when you’re not scraping burnt bits off later.)
Make-ahead tips for leftovers
Prep Ahead for Meal Prep
Start by fully prepping the chicken and aromatics the night before—trim the thighs, chop the vegetables, and store everything in separate airtight containers in the fridge. I like to use glass Pyrex containers because they stack neatly. This saves 30-45 minutes of prep time on cooking day, especially when feeding a crowd. The flavors actually meld better overnight, so your broth will taste even deeper. 💫
Broth Storage Secrets
Make extra broth—it's the star of this recipe! After cooking, let it cool completely, then transfer to quart-sized freezer bags (I use Stasher bags for easy squeezing of air). Label each bag with the date and freeze flat for maximum space. Thawed broth reheats perfectly for soups, rice dishes, or even as a quick pasta sauce base. One batch keeps for 3 months without losing flavor.
Chicken Make-Ahead Timeline
Cook the chicken thighs completely, then store them in the broth at room temperature for up to 2 hours before refrigerating. For best results, reheat gently in the broth over low heat for 10-15 minutes—never microwave directly. The broth helps maintain moisture, so you won't end up with dry chicken. I often prep these for Sunday family dinners and reheat portions throughout the week.
Freezer-Friendly Packaging
Wrap cooled chicken thighs individually in parchment paper, then place them in a single layer in a freezer bag with the broth. This prevents freezer burn and makes it easy to remove just what you need. Thaw overnight in the fridge before reheating—never at room temperature. The thighs keep for 2 months frozen while maintaining their juicy texture when properly reheated. 🥶
Broth Booster Add-Ins
While prepping, add 1 tbsp soy sauce or ½ cup white wine to the broth for extra depth. For a heartier base, include 1 cup cooked rice or barley during the initial simmer. These additions work perfectly for meal prep—just reheat the broth with the grains for a quick one-pot meal. The flavors develop beautifully over time, making this an ideal make-ahead strategy.
Portion Control Tips
Divide the cooked chicken into meal-sized portions (about 4 oz per serving) and store them in the fridge for up to 3 days. Keep the broth separate in a saucepan for easy reheating. When ready to serve, simply warm the broth and pour it over the chicken. This method keeps everything fresh and ready for quick assembly—perfect for busy weeknights or lunch prep. 📅
Nutrition facts
Frequently asked questions
Why do chicken thighs need to be bone-in for boiling?
The bone helps retain moisture and flavor during cooking, creating a richer broth. Bone-in thighs also cook more evenly and stay juicier than boneless cuts. The bone acts like a natural thermometer, ensuring the meat reaches the perfect 175°F temperature without drying out.
Can I use this boiled chicken in salads or sandwiches?
The tender, juicy meat shreds perfectly for chicken salad or works beautifully in sandwiches. Let the chicken cool completely, then shred with two forks. Mix with mayo, celery, and herbs for a classic chicken salad, or slice for sandwiches with your favorite fixings.
What if my chicken thighs float to the surface?
This is normal—the fat rises as the chicken cooks. Just gently press them down with a wooden spoon to keep them submerged. If they float too much, add ½ cup cold water to the pot and stir. The thighs should stay covered by broth for even cooking.
How can I make the broth more flavorful?
Add 1 tbsp soy sauce or ½ cup white wine when simmering the vegetables. For extra depth, include 1 cup cooked rice or barley in the pot during cooking. These additions enhance the broth's umami and make it perfect for soups or grains.
Is it safe to boil chicken thighs without skin?
Yes, but you'll lose some crispiness and flavor. The skin adds richness to the broth and becomes tender when cooked. If using skinless thighs, consider adding 1 tbsp olive oil to the pot to compensate for lost moisture. Always check for 175°F internal temperature regardless of skin.