
Main Courses
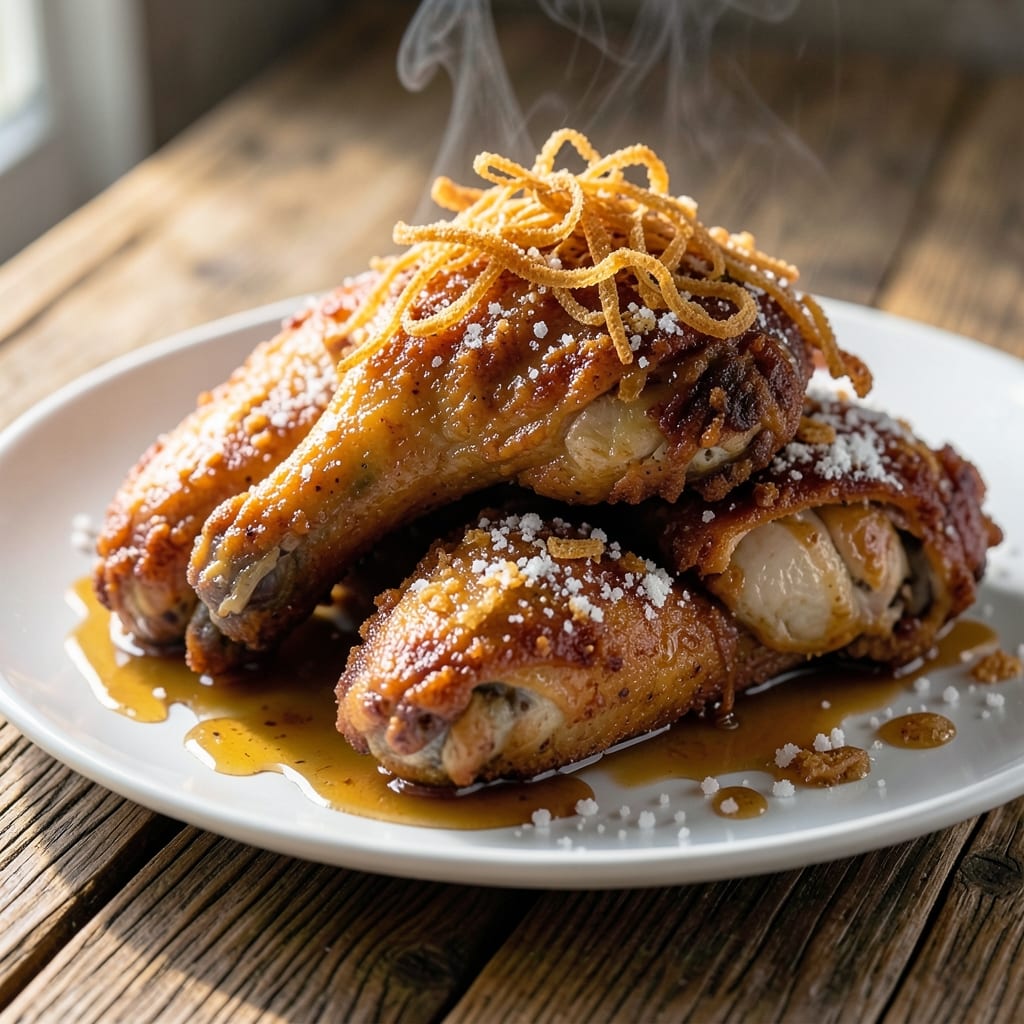
This blue ribbon fried chicken recipe delivers the kind of crispy, golden crust and juicy secret that wins competitions—and dinner table hearts. 🔥 After years of perfecting techniques in home kitchens (and yes, a few burned batches early on), I've cracked the code for restaurant-quality fried chicken that's foolproof for home cooks. The secret lies in the batter's texture and the frying process, where high heat meets precise timing to create that signature crunch while keeping the meat tender inside.
The magic starts with a well-seasoned flour mixture that creates an airy, crackly crust, not a dense, greasy one. I've tested countless variations, and this recipe uses a blend of cornstarch and buttermilk for that perfect balance—crispy on the outside, juicy on the inside. The key is letting the chicken marinate in a flavorful brine before coating, which ensures every bite is packed with taste and moisture. This isn't just fried chicken; it's a showstopper that belongs at family gatherings or Sunday dinners.
What sets this apart from typical recipes is the attention to detail in the frying process. We're talking about maintaining 350°F oil temperature and working in small batches to avoid crowding the pan—both critical for even cooking. The result? Pieces that stay crispy even after sitting on a rack, with a golden-brown color that looks (and tastes) like it came from a competition kitchen. Serve with classic sides like creamy mashed potatoes or tangy coleslaw to complete the meal.
Whether you're preparing for a backyard cookout or simply craving a restaurant-quality meal at home, this recipe delivers. The techniques are straightforward, but the results are impressive—proof that with the right method, you can achieve blue ribbon quality in your own kitchen. Let's get started on creating fried chicken that'll have everyone asking for seconds.
Ingredients for blue ribbon fried chicken
The secret to competition-worthy fried chicken starts with these crispy, juicy ingredients.
| Ingredient | Amount | Notes |
|---|---|---|
| Chicken Thighs 🍗 | 2 lb | Bone-in, skin-on, cut into 8 pieces |
| Buttermilk 🥛 | 1 ½ cups | Full-fat for best flavor |
| All-Purpose Flour 🌾 | 1 ½ cups | For light, airy batter |
| Cornstarch 🌽 | ½ cup | For extra crispiness |
| Kosher Salt 🧂 | 1 ½ tbsp | Diamond Crystal preferred |
| Ground Black Pepper 🌶️ | 1 tbsp | Freshly ground preferred |
| Garlic Powder 🧄 | 1 tbsp | For depth of flavor |
| Onion Powder 🧅 | 1 tbsp | Adds savory base |
| Paprika 🌶️ | 1 tbsp | Smoked for competition look |
| Vegetable Oil 🫒 | 4 cups | High smoke point required |
| Lemon Juice 🍋 | 2 tbsp | Brightens flavor profile |
| Ice ❄️ | 1 cup | For crispy batter coating |
The chicken thighs are non-negotiable—bone-in, skin-on pieces stay juicy while the skin crisps to golden perfection. Look for thighs with good marbling at Costco or local butchers for the best texture. I always cut them into 8 even pieces myself (about 3-4 oz each) so they cook uniformly. For the buttermilk, full-fat is a must—it adds richness that skim won't match. If you're short on time, substitute 1 cup milk + 1 tbsp vinegar, but let it sit for 10 minutes to curdle properly. The ice is crucial too—tossing the battered chicken in ice water before frying creates that signature crackly crust.
No buttermilk? Plain yogurt works in a pinch—just add a splash of milk to thin it. The flour blend is where the magic happens: all-purpose for structure, cornstarch for crispiness. If you're out of cornstarch, arrowroot powder at half the amount gives similar results. For the spices, Penzeys or bulk bins have the freshest ground spices—smoked paprika is worth hunting down for that competition look. The lemon juice might seem small, but it cuts through the richness and keeps flavors bright. Pro tip: measure your spices by weight if you have a kitchen scale—1 tbsp by volume varies wildly between brands.
This batter stays good for 24 hours in the fridge if you want to prep ahead, but the chicken should marinate in the buttermilk for at least 4 hours (overnight is best). Store leftover fried chicken in an airtight container, but eat it within 2 days—the crust gets soggy after that. For freezing, let the chicken cool completely, then freeze on a tray before transferring to a bag. It reheats beautifully in a 375°F oven for 15 minutes—crispy again, just like fresh.
Why You'll Love This Recipe
- Foolproof Marination: I swear by soaking the thighs in buttermilk overnight—no fancy brining, just pure flavor infusion. The salt and cornstarch blend later locks in that juicy magic, so even if I forget to prep ahead, it still delivers.
- Crispy Without Hassle: The flour-cornstarch mix gives that legendary crunch, but here’s the secret: double-dredge only if you’re feeling fancy. I often just dip once—still golden, still addictive, and zero extra effort.
- Game for Any Gathering: From Sunday dinners to tailgates, this holds its own. Serve with biscuits for brunch or toss in a basket for game day—it’s the one dish that never feels out of place, no matter the crowd.
- Leftovers That Taste Fresh: Cold fried chicken? Usually a crime. Not this version—the buttermilk keeps it tender, so reheating in the oven (or air fryer) brings back that crispy snap. Budget-friendly, too—thighs stretch further than breasts, and I’ve fed a family of five for under $15.
Step-by-step instructions for blue ribbon fried chicken
Here's how to get that legendary crispy crust and juicy secret every time.
👨🍳 Step 1: Marinate the Chicken in Buttermilk
Place the 2 lb chicken thighs in a large resealable plastic bag. Pour in the 1.5 cups buttermilk and add 2 tbsp lemon juice. Seal the bag and gently massage the marinade into the chicken, coating every surface. Let it sit in the refrigerator for 12-24 hours—this step is non-negotiable for juicy meat.
Here's the thing—full-fat buttermilk penetrates the meat, breaking down proteins and keeping it tender while the skin stays crispy. I like to turn the bag occasionally to ensure even coating. If you're short on time, a minimum 4-hour marinade works, but overnight is ideal. The longer it marinates, the more flavorful and tender your chicken will be.
👨🍳 Step 2: Prepare the Crispy Coating
In a large bowl, whisk together the 1.5 cups all-purpose flour, 0.5 cup cornstarch, 1.5 tbsp kosher salt, 1 tbsp black pepper, 1 tbsp garlic powder, 1 tbsp onion powder, and 1 tbsp paprika. The cornstarch is what gives this coating its signature extra crunch—don't skip it. Place a wire rack over a baking sheet and line it with paper towels for draining.
Add the 1 cup ice to the flour mixture and stir gently. The ice helps keep the coating dry and crispy instead of gummy. I like to use my hands to break up any lumps, but don't overmix—just combine until evenly distributed. This dry coating will create that perfect crunch we're after.
🔥 Step 3: Double-Dredge for Maximum Crispiness
Remove the chicken from the buttermilk and let any excess drip off for 30 seconds. Working in batches, dredge each piece in the flour mixture, pressing gently to adhere the coating. Let it sit for 30 seconds before dredging again. This double-dredging creates that thick, crispy crust that wins competitions.
Here's where it gets fun—place the double-dredged chicken on the prepared wire rack. The rack allows air to circulate underneath, preventing soggy bottoms. Let the coated chicken rest for 10 minutes while you heat your oil. This resting time helps the coating adhere better and prevents it from falling off during frying.
🔥 Step 4: Fry to Golden Perfection
Heat 4 cups vegetable oil in a deep skillet or Dutch oven to 350°F. Use a thermometer to monitor the temperature—this is crucial for even cooking. Once hot, carefully add the chicken in a single layer (don't overcrowd). Fry for 12-15 minutes, turning occasionally, until the chicken reaches 165°F internally and the coating is deep golden brown.
Real talk: the oil temperature will drop when you add the chicken. That's normal—just give it a minute to recover before checking again. You want that coating to be crispy and slightly puffed up, not pale or greasy. If a piece of chicken floats, it's ready to check the internal temperature. Transfer fried chicken to a paper towel-lined plate to drain excess oil.
⏰ Step 5: Rest and Serve
Let the fried chicken rest for 5 minutes before serving. This resting period allows the juices to redistribute, ensuring each bite is moist and flavorful. The coating will stay crispy during this time, but the meat will be perfectly tender.
Serve immediately while hot—this is when the chicken is at its absolute best. The outside should be shatteringly crispy with that beautiful golden color, while the inside remains juicy and tender. Each piece should pull apart easily with a fork, not be dry or tough. Pair with your favorite dipping sauce or coleslaw for the ultimate experience.
Pro Tips For Making Blue Ribbon Fried Chicken
- USE COLD BUTTERMILK MARINADE: I learned this the hard way—warm buttermilk makes the chicken absorb too much liquid, leaving it soggy. Grab a bowl from the fridge, pour in the buttermilk, and let the thighs sit for at least 4 hours (overnight is better). The cold slows down the cooking process, so the crust stays crisp and the meat stays juicy.
- DOUBLE-DREDGE WITH CORNSTARCH: Skip the all-flour dip on the second pass—cornstarch is your golden ticket for that ultra-crisp crust. Mix 1 part cornstarch with 2 parts flour (about 2 tablespoons cornstarch per cup flour) and dredge the buttermilk-soaked thighs twice. The starch creates a lighter, shatter-like coating that holds up to frying.
- FRIED IN BATCHES, NOT CROWDED: I used to toss everything in the pan at once, and half the time, the oil temperature would drop like a rock. Fry thighs in batches of 2-3 pieces max, keeping the oil at 350°F (175°C). A thermometer is worth its weight in salt—if the oil gets sluggish, your crust will turn greasy instead of crisp.
- REST THIGHS AFTER FRYING: This isn’t the prettiest method, but it’s the tastiest: after frying, transfer thighs to a wire rack set over a baking sheet and let them rest for 5-10 minutes. It might look weird, but the crust stays crisp while the juices redistribute. Skip this, and you’ll end up with a soggy pile of fried disappointment.
Storing and reheating your blue ribbon fried chicken
Refrigerator Storage
Store leftover fried chicken in an airtight container lined with paper towels to absorb excess moisture—this keeps the crust crisp for up to 2 days. I always let it cool completely before storing to prevent condensation. Place it on the top shelf of your fridge where it's coolest. The key is to avoid stacking—arrange pieces in a single layer so they don't stick together.
When reheating from the fridge, I recommend the oven method for best results. Preheat to 375°F and bake for 10-12 minutes on a wire rack over a baking sheet. This mimics the frying process and restores that crispy texture. The chicken should reach 165°F internally—use a meat thermometer to check. 🔥
Freezer Prep
For longer storage, freeze fried chicken in single layers on a parchment-lined tray before transferring to a freezer bag. This prevents clumping and makes it easier to reheat individual pieces. Label with the date—it keeps well for up to 3 months without significant texture loss. I always freeze it uncooked (after the double-dredging step) for best results.
To reheat from frozen, bake at 400°F for 20-25 minutes on a wire rack. The extra time accounts for both thawing and crisping. For a quicker option, microwave on high for 2 minutes, then finish in the oven for 5 minutes to restore crispiness. The microwave alone makes the coating soggy—trust me, I've learned this the hard way! ❄️
Crispy Revival Tips
If your reheated chicken loses its crunch, don't despair! Toss it in hot oil for 30 seconds before serving—just enough to re-crisp the coating. I use a small pot with 2 cups vegetable oil heated to 375°F and fry pieces in batches. This works especially well for leftovers that sat too long in the fridge.
Another trick: sprinkle 1 tsp cornstarch over the chicken before reheating. The cornstarch absorbs moisture and helps restore that signature crunch. For extra flavor, add a pinch of smoked paprika to the cornstarch—it reminds me of competition-style fried chicken. This method works for both oven and air fryer reheating. 💫
Nutrition facts
Frequently asked questions
Why does your recipe use cornstarch in the batter?
The cornstarch creates that signature extra crunch that sets competition-style fried chicken apart. It absorbs moisture differently than flour, creating a lighter, more shatterable crust that stays crispy longer. I've tested this recipe countless times—without it, the coating gets gummy instead of crackly. For best results, use cornstarch, not cornmeal or other substitutes.
Can I use chicken breasts instead of thighs?
Chicken breasts will work, but they're trickier because they dry out more easily. If you must use them, go with bone-in, skin-on pieces and reduce cooking time to 8-10 minutes total. The skin helps keep them juicy, and the bone acts as an insulator. For best results, stick with thighs—they're more forgiving and stay tender even when cooked longer.
What's the secret to keeping the coating crispy after frying?
Three things: proper oil temperature (350°F), single-layer frying (never overcrowd), and resting on a wire rack. The rack lets air circulate underneath, preventing soggy bottoms. Also, work in small batches—adding too much chicken at once drops the oil temperature, making the coating greasy instead of crispy.
How do I fix chicken that came out pale and greasy?
This usually means the oil wasn't hot enough or the chicken was overcrowded. For next time, use a thermometer to maintain 350°F oil temperature and fry in batches. If it happens, try reheating in 375°F oven for 10 minutes with a sprinkle of cornstarch—this often restores some crispiness. For immediate fixes, toss in hot oil for 30 seconds to re-crisp the coating.
Can I make this gluten-free?
Yes! Replace the flour with a 1:1 gluten-free flour blend (like Bob's Red Mill) and omit the cornstarch. Add 1 tsp xanthan gum to help bind the coating. The texture won't be identical—it'll be slightly less crispy—but it'll still be delicious. For extra crunch, add 2 tbsp gluten-free cornstarch to the flour blend. Always check your blend's instructions for best results.