
Main Courses
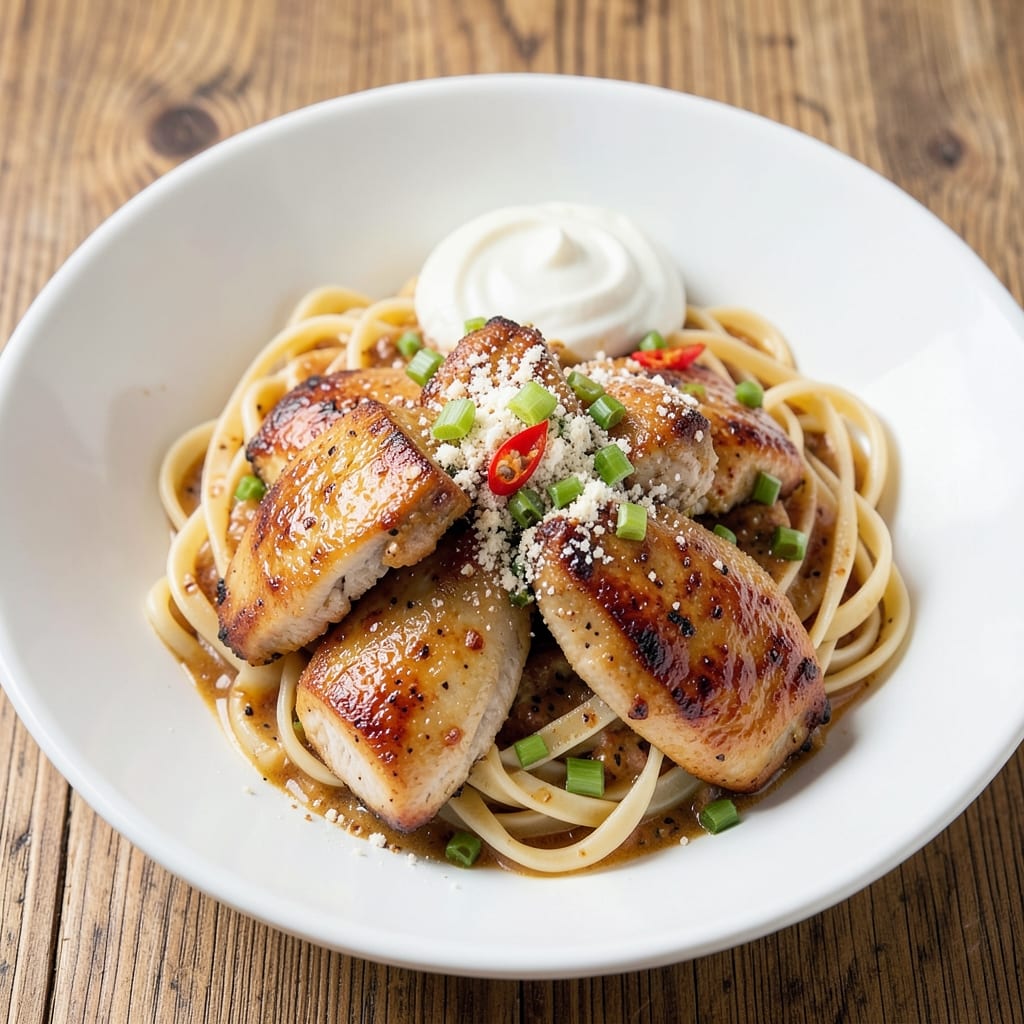
This Bird's Eye Garlic Chicken Pasta delivers a perfect balance of fiery heat and aromatic richness in every bite. 🔥 The secret lies in crispy celery-crusted chicken bites that pack a spicy kick from Bird's Eye chili, while fragrant yogurt streaks cool the heat beautifully. I developed this recipe after years of perfecting spicy-savory dishes that still feel approachable for home cooks—no complex techniques required, just bold flavors that come together in under 30 minutes.
The foundation starts with tender chicken thighs coated in a celery-garlic-chili crust that crackles with every bite, delivering that perfect balance of crispy exterior and juicy interior. The pasta gets tossed in a creamy yogurt sauce infused with garlic and fresh herbs, which not only cools the spice but also adds a luxurious texture. What makes this dish special is how the heat builds gradually—starting with a subtle warmth that grows into a satisfying burn without overpowering the meal.
By the time you're done, you'll have a restaurant-quality dish that's packed with layers of flavor: the spicy celery crust on the chicken, the fragrant garlic-yogurt sauce, and the al dente pasta that soaks up every bit of flavor. This recipe is designed to impress without being intimidating, making it perfect for weeknight dinners or when you want to bring a little heat to your table. The yogurt streaks add a visual appeal that makes plating effortless and delicious.
Serve with a simple side salad or garlic bread to round out the meal, and don't forget to adjust the spice level to your taste by adding more or less Bird's Eye chili. The beauty of this dish is its versatility—it works as a comforting weeknight meal or a showstopper for dinner guests. Let's get cooking!
Ingredients for birds eye garlic chicken pasta
Pantry staples meet bold flavors—crispy-spicy chicken bites and creamy yogurt sauce in one dish!
| Ingredient | Amount | Notes |
|---|---|---|
| Boneless, Skinless Chicken Thighs 🍗 | 1 ½ lb | Cut into 1-inch pieces |
| Celery Stems 🧅 | 2 cups | Finely chopped (stems only) |
| Garlic Cloves 🧄 | 8 cloves | Minced for crust and sauce |
| Bird's Eye Chili Peppers 🌶️ | 4 whole | Finely chopped (adjust for heat) |
| All-Purpose Flour 🌾 | ½ cup | For coating chicken |
| Plain Yogurt 🥛 | 1 cup | Full-fat for creaminess |
| Extra-Virgin Olive Oil 🫒 | ¼ cup | For frying and sauce |
| Ditalini Pasta 🍝 | 12 oz | Al dente preferred |
| Fresh Parsley 🌿 | ¼ cup | Chopped for garnish |
| Fresh Cilantro 🌿 | 0.2 cup | Chopped for garnish |
| Lemon Juice 🍋 | 1 tbsp | Freshly squeezed |
| Salt 🧂 | 1 ½ tsp | Kosher or sea salt |
| Ground Black Pepper 🌶️ | ½ tsp | Freshly ground |
| Vegetable Oil 🫒 | 1 cup | For frying chicken |
The Bird's Eye chili peppers are non-negotiable here—they deliver that fiery kick that makes this dish unforgettable. Grab the freshest ones you can find at Asian markets or the produce section of Whole Foods, where they usually have them in the freezer section too. For the celery, use the stems only—they're more flavorful and give that perfect crunch. Chicken thighs are a must over breasts; they stay juicy while getting that crispy crust. If you can't find Bird's Eye, Thai bird's eye chili flakes work in a pinch, but they're hotter, so start with half the amount.
No yogurt? Greek yogurt or sour cream will work, but full-fat plain yogurt gives that luxurious texture. The celery crust can get soggy if you skip the flour—it's the secret to that perfect crunch. Short on fresh herbs? Dried parsley or cilantro at one-third the amount will do, but nothing beats the fresh stuff. For the pasta, ditalini is ideal—its small shape soaks up all the sauce—but any short pasta works. And if you're worried about the heat, add more yogurt streaks to cool it down. Trust me, it balances perfectly.
This dish reheats beautifully—just toss with a splash of water to keep it creamy. Keeps in the fridge for 3 days, or freeze the chicken bites separately for up to 2 months. I always double the sauce because it disappears fast. Garnish with extra chili flakes if you want more heat, or a sprinkle of toasted sesame seeds for crunch. Serve with garlic bread to soak up every last drop of that spicy-yogurt goodness.
Why You'll Love This Recipe
- One-Pot Magic: I swear by this recipe when I’m too tired to wash three pans—just toss everything in one deep skillet, and the celery and garlic caramelize right into the sauce. The chicken thighs stay juicy while the pasta cooks in the same liquid, so you’re not left with sad, dry bits.
- Spicy-Sweet Crunch: That bird’s eye chili paste gives it a kick—not overwhelming, but enough to make your taste buds dance. Honestly, the way the flour thickens the sauce into a glossy, slightly sticky glaze? It’s the kind of dish that disappears faster than my willpower when I’m hungry.
- Lunchbox Hero: Between us, this is my go-to for meal prep because it reheats like a dream. Pack the leftovers cold for a hearty lunch, or warm them up with a splash of pasta water—no soggy noodles here. My kids actually ask for it, and that’s saying something.
- Budget Night Savior: Chicken thighs are cheaper than breasts, and celery lasts forever in the crisper. I’ll be real: this recipe stretches to feed four for under $12, and the flavor punches way above its price. Plus, the flour step turns basic pantry staples into something restaurant-worthy without breaking the bank.
Step-by-step instructions for spicy celery-crusted chicken pasta
Here's how to make this fiery, fragrant dish with crispy chicken and aromatic yogurt sauce.
🍳 Step 1: Create the Celery-Garlic Crust
In a food processor, pulse the 2 cups celery stems and 8 cloves garlic until finely chopped but not pureed. You want a coarse texture—this will form the crispy crust on our chicken. Transfer to a bowl and mix with 0.5 cup all-purpose flour, 1.5 tsp salt, and 0.5 tsp black pepper. This dry mix is our secret weapon for that addictive crunch.
While that mixes, cut the 1.5 lb boneless chicken thighs into 1-inch pieces. Pat them completely dry with paper towels—this ensures maximum crispiness when frying. The dry crust will cling better to the dry chicken, creating that perfect crunchy exterior we're after.
👨🍳 Step 2: Coat and Fry the Chicken
Heat 1 cup vegetable oil in a deep skillet over medium-high heat until it reaches 350°F—use a thermometer to be precise. Working in batches (don't overcrowd!), toss each chicken piece in the celery mixture until fully coated. Let the excess fall off—this ensures even crispiness.
Fry for 3-4 minutes per batch until the crust turns deep golden brown and the chicken reaches 165°F internally. The celery will caramelize beautifully, creating that signature crunch. Transfer to a paper towel-lined plate to drain excess oil, but keep warm—we'll be back for these beauties.
🥘 Step 3: Build the Yogurt-Garlic Sauce
In the same skillet (no need to clean it—those crispy bits are flavor gold), reduce heat to medium and add 0.25 cup extra-virgin olive oil. Sauté the 4 finely chopped bird's eye chilies for 1 minute—just until fragrant, not burned. Add the remaining celery mixture and cook for 2 minutes until toasted.
Pour in 1 cup plain yogurt and stir vigorously. The sauce will thicken immediately from the residual heat. Add 1 tbsp lemon juice and simmer for 3-4 minutes until slightly reduced. Taste and adjust salt—this sauce should be tangy, creamy, and just spicy enough to make your eyes water a little.
🍳 Step 4: Cook the Pasta and Combine
Bring a large pot of salted water to a boil and cook the 12 oz ditalini pasta until al dente—about 2 minutes less than package directions. Reserve 1 cup pasta water before draining. Toss the hot pasta directly into the yogurt sauce in the skillet, adding pasta water as needed to loosen the sauce to a creamy consistency.
Return the crispy chicken to the skillet and toss everything together. The residual heat will melt any remaining flour in the crust, creating a perfect marriage of textures. Let it sit for 1 minute so the chicken absorbs some of that amazing sauce.
🍽️ Step 5: Finish and Serve
Divide the pasta among plates and garnish with 0.25 cup chopped parsley and 0.2 cup chopped cilantro. The contrast of cool herbs against the spicy, creamy sauce is what makes this dish sing. Serve immediately while the chicken is still crispy—this isn't a dish that waits.
Here's the thing—this recipe delivers on all fronts. The celery crust gives you that addictive crunch, the yogurt sauce cools the heat just enough, and the ditalini pasta soaks up every last bit of flavor. Each bite is a perfect balance of spice, creaminess, and texture that'll have you coming back for seconds. Trust me, you'll want to.
Pro Tips For Making Birds Eye Garlic Chicken Pasta
- CRANK THE HEAT FIRST: Bird’s eye chili and garlic demand high heat to sing—don’t wimp out. Sear the chicken thighs in a screaming-hot pan for 3-4 minutes per side until they’re deep golden, or the sauce will taste flat and underdeveloped. I learned this the hard way when my first batch tasted like a sad stir-fry.
- SLICE THOSE PEPPERS THIN: Bird’s eye chilies pack serious heat, but their power fades when they’re chunky. Mince the stems first, then slice the peppers lengthwise into paper-thin strips. This way, the heat distributes evenly, and you won’t end up with one bite that’s a spicy disaster—(yes, even if you’re impatient like me).
- DON’T OVERWORK THE FLOUR: The flour coating on the chicken is for crispiness, not glue. Pat the thighs dry, toss them in flour, then let it sit for 30 seconds—no shaking or pressing. Overhandling makes the coating gummy, and suddenly your crispy chicken turns into a sad, greasy mess. Trust the process.
- SWEAT THE CELEERY FIRST: If you’re making a roux or base, cook the celery in the same oil as the garlic—before the chicken goes in. This softens the fibers and keeps the sauce from turning grainy later. I skip this sometimes, and the texture suffers. Not worth the shortcut.
Perfect pairings for these flavors
Creamy Yogurt Sauce
The star of this dish is the yogurt-garlic sauce, which balances the fiery Bird's Eye chili with cool, creamy richness. I love using full-fat plain yogurt for maximum creaminess, but Greek yogurt works too if you prefer a thicker texture. For extra depth, add 1 tsp grated ginger or ½ tsp ground cumin to the sauce while simmering—both complement the spicy notes beautifully. 🥛
Crispy Celery Crust
Don’t skip the celery stems—they’re the secret to that addictive crunch! Pulse them coarsely in a food processor to avoid turning them into mush. For extra flavor, toast the celery mixture in the skillet for 2-3 minutes before adding the yogurt. This caramelizes the natural sugars, adding a subtle sweetness that rounds out the spice. Pro tip: Use low-sodium vegetable broth instead of water when cooking the pasta to enhance the sauce’s depth.
Spicy Beverage Pairings
This dish’s heat demands a cooling beverage. I reach for sparkling lemonade—the effervescence cuts through the richness, while the citrus brightens the palate. For something stronger, a light lager like Peroni or Corona works wonders, especially with a lime wedge. Avoid heavy beers or dark wines; they’ll clash with the dish’s vibrant flavors. 🍋
Herb Garnish Variations
Fresh herbs elevate this dish, but don’t overlook dried options if you’re short on time. Use ½ tsp dried parsley or ¼ tsp dried cilantro (sparingly—they’re more potent). For a smoky twist, sprinkle toasted sesame seeds or crushed fried shallots on top. I also love adding thinly sliced scallions for a crisp, oniony bite that ties everything together.
Side Dish Suggestions
This pasta is hearty enough to stand alone, but I often serve it with garlic bread to soak up the sauce. For a lighter option, a simple cucumber salad with rice vinegar and sesame oil adds refreshing crunch. If you’re serving a crowd, roasted Brussels sprouts with a sprinkle of chili flakes make a bold, complementary side. 🥗
Make-Ahead Tips
Prep the celery-garlic crust mix and store it in an airtight container for up to 3 days—it keeps well in the fridge. For the sauce, make it ahead and refrigerate; reheat gently over low heat, adding a splash of water to restore creaminess. The chicken bites can be fried and stored separately for 2 days, but I recommend reheating them in a skillet to revive the crust. This dish is perfect for meal prep because the flavors only deepen over time!
Nutrition facts
Frequently asked questions
Can I use chicken breasts instead of thighs?
You can try, but thighs are ideal for this recipe! Chicken breasts cook faster and tend to dry out when fried, which can make the celery crust less crispy. If you must use breasts, cut them into ½-inch thick pieces and fry for only 2-3 minutes per side until just cooked through (165°F). For extra moisture, marinate them in 1 tbsp yogurt for 15 minutes before coating.
How do I adjust the spice level?
The Bird's Eye chili delivers serious heat! For milder flavor, reduce to 2 peppers or remove the seeds/membranes before chopping. For extra kick, add ½ tsp chili flakes to the sauce or serve with extra chili flakes on the side. Remember: the yogurt sauce naturally balances the heat—don't be afraid to add more if needed!
What if I don't have a food processor?
No problem! Finely chop the celery stems and garlic by hand using a sharp knife. For even texture, pulse them in batches with a few ice cubes in a ziplock bag—this creates a coarse chop without a food processor. The crust will still work, though it might be slightly less uniform. Toast the chopped celery in the skillet for 2 extra minutes to enhance flavor.
Can I make this dish ahead of time?
Prep the celery-garlic crust mix and store it in an airtight container for up to 3 days. For the sauce, make it ahead and refrigerate—reheat gently over low heat, adding a splash of water to restore creaminess. Fry the chicken just before serving to keep the crust crispy. The pasta is best cooked fresh, but you can reheat leftovers with a splash of water to prevent drying.
Why does my celery crust turn soggy?
Soggy crusts usually happen when the chicken isn't fully dried before coating or when the oil isn't hot enough. Pat the chicken pieces very thoroughly with paper towels, and ensure your oil reaches 350°F before frying. Another trick: double-coat the chicken—dip in flour first, then the celery mixture. This creates a better barrier against moisture. Fry in small batches to avoid crowding the pan.