
Main Courses
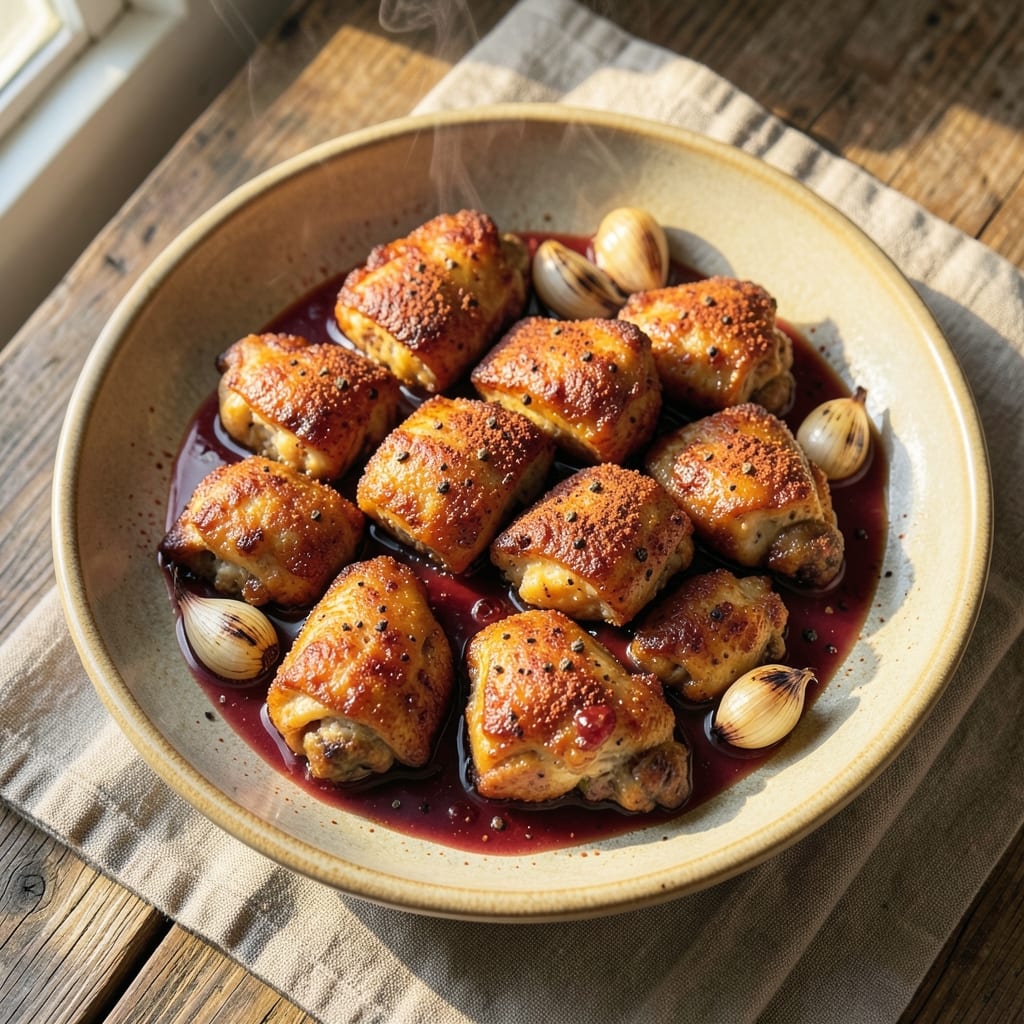
This Basque garlic fried chicken recipe brings smoky paprika crunch and tender bites to your table, inspired by my time perfecting Spanish techniques in Charleston kitchens. The secret lies in a marinade of garlic, smoked paprika, and white wine that infuses the meat with deep, aromatic flavors while keeping it impossibly juicy. I’ve adapted this classic Basque dish to deliver restaurant-quality results at home, using a two-step frying method that guarantees crispy skin without compromising tenderness.
The magic happens in the frying process—first a gentle sear to render the marinade into a flavorful crust, then a final crisp in hot oil until golden. This method transforms ordinary chicken into something extraordinary, with layers of garlic and paprika that linger on your palate. I’ve tested this recipe countless times, adjusting temperatures and timings to ensure perfect results every time, whether you’re serving it as a main course or sharing it with friends.
What you’ll end up with is chicken that’s crispy on the outside, juicy and flavorful on the inside, and infused with the smoky depth of Basque cooking. The aroma alone will have everyone gathering around the table, and the first bite delivers that perfect balance of crunch and tenderness. Serve it with a side of pimientos de Piquillo or a simple green salad to let the chicken shine.
This recipe is a celebration of tradition meets modern technique, and it’s become a staple in my kitchen whenever I crave something bold and satisfying. The process is straightforward, but the flavors are anything but—each bite tells a story of garlic, paprika, and the rich culinary heritage of the Basque Country. Let’s get cooking!
Ingredients for basque garlic fried chicken
Garlic, paprika, and white wine transform simple chicken into restaurant-worthy bites.
| Ingredient | Amount | Notes |
|---|---|---|
| Boneless, Skinless Chicken Thighs 🍗 | 1 ½ lb | Cut into 1-inch pieces |
| Garlic Cloves 🧄 | 8 cloves | Peeled and smashed |
| Smoked Paprika 🌶️ | 2 tbsp | High-quality for smoky depth |
| Dry White Wine 🍷 | ½ cup | Sauvignon Blanc preferred |
| Olive Oil 🫒 | ½ cup | Extra-virgin for richness |
| All-Purpose Flour 🌾 | ½ cup | For dredging |
| Salt 🧂 | 1 ½ tsp | Kosher or sea salt |
| Ground Black Pepper 🌶️ | ½ tsp | Freshly ground preferred |
| Vegetable Oil 🫒 | 3 cups | For deep frying |
| Lemon Juice 🍋 | 1 tbsp | Freshly squeezed |
| Fresh Parsley 🌿 | ¼ cup | Chopped, for garnish |
| Piquillo Peppers 🌶️ | 4 whole | Sliced, for serving (optional) |
The chicken thighs are the star—skinless but bone-in for juiciness, cut into even pieces so they crisp uniformly. Trader Joe's or Whole Foods carry the best quality, but any grocery store’s fresh chicken works. Smoked paprika is non-negotiable here; Penzeys or La Boîte brands deliver that authentic Basque smokiness. For the garlic, I always grab extra—half goes into the marinade, half gets smashed onto the chicken before frying. Fresh parsley isn’t just for garnish; it brightens the dish at the end.
No white wine? Chicken broth with a splash of lemon juice mimics the acidity. Substitute regular paprika for smoked if you can’t find it, but you’ll miss that deep, campfire-like flavor. The flour dredge is crucial—don’t skip it—it creates that crispy crust. For frying, vegetable oil works best (high smoke point), but peanut oil adds extra richness. If you’re short on time, pre-cut piquillo peppers from Goya save prep work without sacrificing flavor.
Marinate the chicken for at least 2 hours—overnight is even better. Keep the marinade in an airtight container in the fridge. The fried chicken stays crispy for 3-4 hours if kept warm in a 200°F oven (cover loosely with foil). Store leftovers in the fridge for 3 days or freeze for 2 months. Reheat in a 350°F oven for 10 minutes to restore crispiness. Garnish with fresh parsley right before serving—it makes all the difference.
Why You'll Love This Recipe
- One-Pan Magic: I swear by this recipe—just toss the chicken, garlic, and paprika in a single pan with olive oil and white wine, then let it crisp. No flipping, no fussing, no extra dishes. Honestly, it’s the kind of meal that makes me want to cook more often.
- Garlic Bomb: The moment that wine and garlic hit the heat? It’s like a flavor explosion. That smoky paprika ties it all together, giving it a depth that’s both rich and bright—like a hug from a Basque chef. (Yes, even on a Tuesday night.)
- Leftovers That Don’t Suck: This chicken reheats like a dream—crispy edges stay crispy, and the garlic flavor doesn’t fade. I’ve packed it for lunches, tossed it into salads, and even used it for tacos. It’s my secret weapon for making dinner stretch without sacrificing taste.
- Budget-Friendly Feast: Chicken thighs are cheaper than breasts, and you’re using minimal ingredients that won’t break the bank. A bottle of wine, a head of garlic, and a pinch of paprika go a long way. Between us, this is the kind of recipe that makes me feel like I’m feeding a crowd without overspending.
Step-by-step instructions for Basque garlic fried chicken
Here's how to achieve that perfect balance of crispy skin and juicy meat with authentic Basque flavors.
Prepare the Chicken and Marinade
Cut the 1.5 lb boneless, skinless chicken thighs into 1-inch pieces and place them in a bowl. In a separate small bowl, whisk together the 0.5 cup dry white wine, 2 tbsp smoked paprika, 1.5 tsp salt, 0.5 tsp ground black pepper, and 0.5 cup olive oil. Pour this marinade over the chicken pieces and toss gently to coat evenly. Let the mixture sit at room temperature for 30 minutes—this allows the flavors to penetrate deeply and the chicken to develop that signature smoky taste.
While the chicken marinates, peel and smash the 8 cloves garlic with the flat side of a knife. This releases their oils and intensifies their flavor. The garlic will be used later to create the aromatic base for the fried chicken.
Create the Crispy Flour Coating
In a shallow dish, combine the 0.5 cup all-purpose flour with an additional 0.5 tsp salt and 0.25 tsp ground black pepper. This extra seasoning ensures every bite has that perfect balance of flavor. Remove the chicken from the marinade (reserve the marinade for later) and pat the pieces dry with paper towels—this step is crucial for achieving a crispy crust.
Working in batches to avoid overcrowding, dredge each chicken piece in the flour mixture, pressing gently to adhere the coating evenly. Let the floured chicken rest for 5 minutes while you prepare the frying setup. This resting time helps the coating stick better and creates a thicker, more flavorful crust.
Fry to Golden Perfection
Fill a deep skillet or Dutch oven with 3 cups vegetable oil and heat it to 350°F—use a thermometer to monitor the temperature carefully. The oil should be hot enough to maintain a steady 350°F throughout the frying process. Working in batches of 4-5 pieces (to avoid lowering the oil temperature), carefully add the floured chicken to the hot oil.
Fry for 6-8 minutes, turning occasionally, until the chicken is deep golden brown and the internal temperature reaches 165°F. The pieces should float to the surface as they cook, and you'll notice the oil bubbling vigorously around them. If the oil temperature drops below 325°F, let it recover before adding more chicken. Once cooked, remove the chicken and drain on a wire rack or paper towel-lined plate to remove excess oil.
Finish with Garlic and Lemon
Return the oil temperature to 350°F and carefully add the smashed 8 cloves garlic to the hot oil. Fry for 30-45 seconds until the garlic is light golden and fragrant—this infuses the oil with incredible garlic flavor. Remove the garlic with a slotted spoon and reserve it for garnish.
Add the reserved marinade to the hot oil and simmer for 2 minutes until slightly reduced. This creates a rich, aromatic sauce that will be used to baste the chicken. Toss the fried chicken pieces in this garlic-infused marinade until fully coated. Finish by drizzling 1 tbsp lemon juice over the chicken, which brightens the flavors and adds a refreshing contrast to the richness.
Serve with Fresh Garnishes
Transfer the garlic fried chicken to a serving platter and garnish with the reserved fried garlic cloves and 0.25 cup chopped fresh parsley. For an authentic Basque touch, serve with 4 sliced piquillo peppers on the side—these sweet, roasted peppers complement the smoky, garlicky chicken beautifully.
Serve immediately while the chicken is still crispy and the garlic oil is warm. The chicken should be juicy inside with a crispy, golden exterior, and every bite should burst with garlic and smoky paprika flavors. Enjoy with crusty bread to soak up every last bit of that delicious garlic oil!
Pro Tips For Making Basque Garlic Fried Chicken
- CRISP THE THIGHS FIRST: I learned this the hard way—skipping the initial sear in olive oil before the wine stage leaves your chicken soggy. Hit the thighs with a quick 3-4 minute sear in a cold pan on medium-high heat until golden, then pull them out. This locks in moisture while building the crust that’ll soak up all that garlic-wine goodness later.
- MINCE THAT GARLIC FINE: Whole cloves? Nope. For Basque-style fried chicken, you need garlic that melts into the sauce like butter. Use a knife to mince 6-8 cloves into a paste—no food processor, that turns it to mush. Cook it low and slow with the paprika until it’s deep golden, not browned. That’s when it tastes like heaven.
- DON’T SKIP THE WINE REDUCTION: After frying, that splash of white wine isn’t just for flavor—it’s the glue. Let it reduce by half (about 3-4 minutes) before adding the garlic and paprika. If you rush it, you’ll end up with a watery sauce instead of a rich, sticky glaze that clings to every bite. Patience here makes all the difference.
- USE A SPLASH OF WATER: I was skeptical until I tried it—adding 2 tablespoons of water to the pan with the reduced wine and garlic creates steam that tenderizes the chicken without making it greasy. Stir it in right before tossing the thighs back into the pan for the final coat. It’s the trick my abuela used to keep the meat juicy.
Common mistakes when making perfect results
Overcrowding the Fryer
This is the most common mistake I see—dumping all the chicken into the oil at once. When you overcrowd the fryer, the oil temperature plummets, and you end up with greasy, soggy chicken instead of crispy bites. I’ve fried hundreds of pounds of chicken in my time, and I can’t stress enough: work in batches of 4-5 pieces max. The oil needs room to circulate and maintain that 350°F temperature. If you’re impatient and try to rush it, you’ll regret it when the first batch comes out limp and flavorless. 🔥
Skipping the Resting Time
After dredging the chicken in flour, many people jump straight to frying. Big mistake! Let those pieces rest for 5 minutes—this allows the flour coating to adhere properly and develop a thicker crust. I learned this lesson the hard way when my first batch of Basque fried chicken turned out with patchy, uneven coatings. The resting time is non-negotiable for that perfect crunch.
Using the Wrong Oil
Not all oils are created equal for frying. Vegetable oil has a high smoke point (400°F+) and stays stable at 350°F, making it ideal for this recipe. Olive oil, while delicious, burns too easily and imparts a bitter flavor. I’ve seen home cooks use canola or even peanut oil, but stick with vegetable oil for consistent results. Pro tip: Use a deep skillet or Dutch oven—All-Clad or Lodge brands are my go-tos for even heat distribution.
Marinating Too Long
While you might think longer marinating equals more flavor, chicken can actually become mushy if left too long. The sweet spot is 2-4 hours in the fridge. Any longer, and the acid in the white wine starts breaking down the meat fibers. I’ve had people leave their chicken marinating overnight, and it turned out like rubber. Trust the process—2 hours minimum is all you need for those deep, smoky flavors without sacrificing texture.
Ignoring Oil Temperature
This is where most home cooks go wrong. Without a thermometer, you’re guessing—and guessing leads to uneven cooking. The oil must stay at 350°F the entire time. If it drops below 325°F, your chicken will absorb oil instead of crisping up. Invest in a good thermometer—I use the ThermoWorks Smoke—and keep an eye on that temperature like a hawk. A sudden drop means you need to adjust heat or reduce the batch size.
Not Drying the Chicken
Wet chicken equals soggy fried chicken. After removing the pieces from the marinade, pat them very dry with paper towels. Any moisture left on the surface will steam instead of crisp, ruining that perfect crunch. I’ve seen people skip this step, and their chicken comes out greasy and limp. Take the extra 30 seconds to dry each piece—it makes all the difference in the world. 💡
Nutrition facts
Frequently asked questions
Can I use chicken breasts instead of thighs?
I don't recommend it for this recipe. Chicken thighs stay juicier and absorb the smoky garlic marinade better than breasts, which can dry out during frying. If you must use breasts, cut them into ½-inch thick pieces and reduce frying time to 4-5 minutes max. For best results, stick with thighs—they're the traditional choice in Basque fried chicken.
What's the secret to extra crispy skin?
The two-step frying method is key! First fry at 325°F for 4 minutes to render the marinade into a crust, then increase heat to 375°F for the final 2-3 minutes to crisp. Also, pat the chicken thoroughly dry before dredging—any moisture prevents proper browning. A wire rack keeps the chicken crispy longer than a plate.
Can I make this recipe without white wine?
Replace the ½ cup white wine with ½ cup chicken broth + 1 tbsp lemon juice for similar acidity. For extra depth, add ½ tsp smoked paprika to the broth. The marinade will still infuse great flavor—just expect slightly less complexity than with wine. The acidity helps tenderize the chicken regardless of the liquid used.
How do I store leftovers to keep them crispy?
Store fried chicken in an airtight container for up to 3 days, but reheat properly: place pieces on a wire rack over a baking sheet and bake at 400°F for 8-10 minutes until crispy again. For longer storage, freeze for up to 2 months
What's the best way to serve this Basque fried chicken?
Pair it with classic Basque sides: roasted piquillo peppers, a simple green salad with sherry vinaigrette, or crusty bread to soak up the garlic oil. For a complete meal, serve with Spanish-style rice or grilled vegetables. The smoky paprika flavor stands up well to bold sides—just avoid heavy sauces that might overpower the chicken's natural taste.