
Main Courses
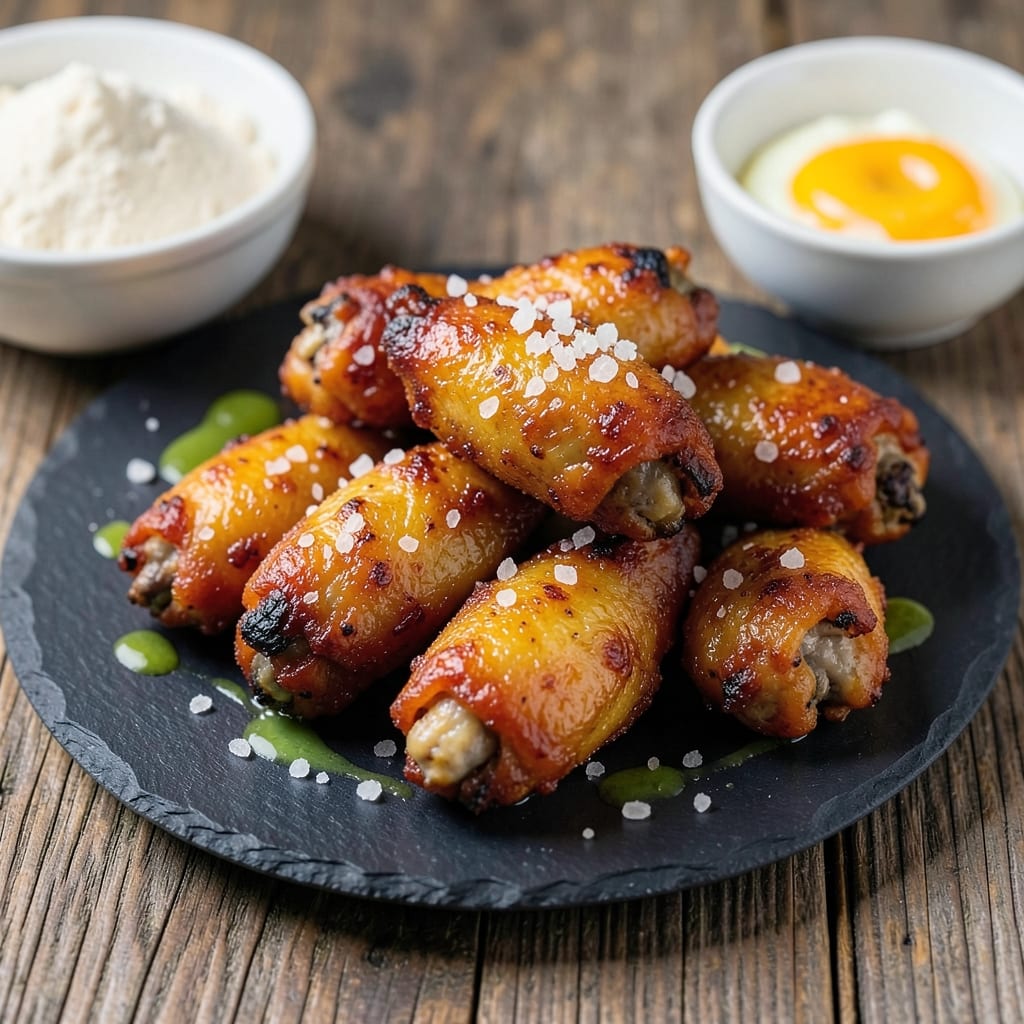
This basic fried chicken wings recipe delivers the crispy, golden perfection you crave—double-fried for a crunch that stays all night. 🔥 The secret? A simple marinade, a light but sturdy coating, and precise frying techniques that guarantee juicy meat every time. I've perfected this method after years of testing, and it never fails to impress—whether you're feeding a crowd or just craving wings on a lazy Sunday.
The process starts with a flavorful brine that tenderizes the wings while adding depth, followed by a crispy coating of flour and spices. The double-frying step—first at a lower temperature to cook through, then at a higher heat to lock in that crunch—is what sets these apart from ordinary wings. You'll need just a few pantry staples, and the results are worth every minute of prep.
What you'll end up with is wings that are crispy on the outside, juicy on the inside, with a golden-brown crust that shatters at every bite. The flavor is rich but balanced, thanks to the marinade's blend of herbs and spices, and the double-fry ensures that crunch lasts even after hours of serving. This is the kind of recipe that turns a simple weeknight into a memorable meal.
Serve with classic ranch or blue cheese dressing, or get creative with spicy aioli or honey mustard. The possibilities are endless, but the method stays foolproof—no matter how many times you make it. Let's get started on wings that'll have everyone asking for seconds.
Ingredients for basic fried chicken wings
Pantry staples plus a few key ingredients for wings that stay crispy all night long.
| Ingredient | Amount | Notes |
|---|---|---|
| Chicken Wings 🍗 | 3 ½ lb | Split into drumettes and flats |
| All-Purpose Flour 🌾 | 2 cups | Lightly seasoned with salt |
| Large Eggs 🥚 | 2 whole | Beaten for coating |
| Butter 🧈 | ½ cup | Melted for frying |
| Vegetable Oil 🫒 | 4 cups | High smoke point preferred |
| Kosher Salt 🧂 | 1 ½ tbsp | For brine and seasoning |
| Black Pepper 🌶️ | 1 tbsp | Freshly ground preferred |
| Garlic Powder 🧄 | 1 tbsp | For flavor depth |
| Onion Powder 🧅 | 1 tbsp | For balanced flavor |
| Paprika 🌶️ | 1 tbsp | Smoked for extra flavor |
| Lemon Juice 🍋 | 2 tbsp | Freshly squeezed |
| Water 💧 | 4 cups | For brine mixture |
| Ice Cubes ❄️ | 1 cup | For chilling brine |
The wings are the star, so grab bone-in, skin-on wings—they stay juicier than boneless. Costco or Trader Joe's usually have great deals on bulk packs, but any grocery store will work. Look for fresh, plump wings with a slight sheen (not dried out). The brine is non-negotiable here—it tenderizes the meat while adding depth. I use Diamond Crystal kosher salt because it dissolves perfectly, but any kosher salt works. For the frying, vegetable oil or peanut oil is ideal—they handle high heat without burning.
No fresh garlic powder? Toast whole garlic cloves and grind them—it makes a huge difference. Running short on butter? Lard or bacon grease works too, but keep it to a 1:1 ratio. Prefer a spicier kick? Add ½ tsp cayenne to the flour mix. The lemon juice brightens everything up, but if you're out, a splash of white vinegar does the trick. For the double-fry, use a deep fryer or heavy pot—never skimp on oil. Keep it hot (350°F for first fry, 375°F for second) or the wings won’t crisp properly.
Brine the wings overnight for best results, but at least 4 hours if you're short on time. Store leftover wings in an airtight container with a paper towel to absorb grease—keeps them fresh for 3 days. For reheating, bake at 375°F for 10-12 minutes to restore that crispy texture. Pro tip: Freeze wings uncooked in a single layer before brining—they’ll crisp up just as well later.
Why You'll Love This Recipe
- No-Fuss Coating: I swear by this method—just flour, eggs, and a pinch of salt. No fancy seasoning blends or complicated steps, yet it still gets that golden, shatteringly crisp crust every time.
- Butter-Kissed Magic: That butter in the oil isn’t just for flavor—it transforms the wings into something dangerously addictive. The outside stays crisp, the inside stays juicy, and honestly? It’s the little things like this that make home cooking feel like a win.
- Game for Any Gathering: Whether it’s a last-minute Super Bowl snack or a weeknight dinner for the fam, these wings handle it all. Double the batch for leftovers (they reheat like a dream) or serve them as-is with ranch—no fuss, just satisfaction.
- Pantry Staple Power: Five ingredients, zero specialty items. If you’ve got flour, eggs, and oil, you’ve got wings. Between us, this is my go-to when I’m broke or lazy—both of which happen more often than I’d like to admit.
Step-by-step instructions for crispy double-fried chicken wings
Here's how to get wings with that legendary crunch that stays crispy for hours.
👨🍳 Step 1: Prep the Wings with a Flavor-Packed Brine
In a large bowl, combine the 4 cups water, 1 cup ice cubes, 1.5 tbsp kosher salt, 1 tbsp black pepper, 1 tbsp garlic powder, 1 tbsp onion powder, and 1 tbsp paprika. Stir until everything dissolves completely—this ensures even flavor distribution.
Add the 3.5 lb chicken wings (split into drumettes and flats) to the brine. Make sure they're fully submerged, turning them occasionally. Let them soak for at least 30 minutes (or up to 2 hours in the fridge) while you prep the rest. This step seasons the meat deeply and keeps it juicy during frying.
🍳 Step 2: Create the Double-Coating Station
Set up three shallow bowls: one with the 2 cups all-purpose flour lightly mixed with 1 tbsp black pepper, another with the 2 whole large eggs beaten until frothy, and a third with the 2 tbsp lemon juice mixed with 1 tbsp paprika for extra zing.
Drain the wings thoroughly and pat them dry with paper towels—this is critical for maximum crispiness. The double-coating technique (flour, egg wash, flour) creates that signature crunch. Work in batches to avoid overcrowding, which can make the coating soggy.
🔥 Step 3: First Fry for Maximum Crispiness
In a deep skillet or Dutch oven, heat 4 cups vegetable oil to 350°F—use a thermometer to monitor this carefully. When the oil is shimmering, carefully add the coated wings in a single layer (don't overcrowd). Fry for 4-5 minutes until they turn a pale golden color—they'll finish cooking in the second fry.
Remove the wings and let them drain on a wire rack for 2 minutes—this prevents sogginess. Here's the secret: don't skip the draining step. The excess oil needs to evaporate before the second fry, or your wings will turn greasy instead of crispy.
🔥 Step 4: Second Fry for That Legendary Crunch
Increase the oil temperature to 375°F—this higher heat is what creates that irresistible crunch. Working in batches, fry the wings again for 2-3 minutes until they reach a deep golden brown color. The double-fry process locks in moisture while building that satisfying texture.
Transfer the wings to a paper towel-lined plate to drain any excess oil. They'll be piping hot, so let them rest for 5 minutes before serving. This resting period helps the coating set and prevents the wings from getting soggy when you handle them.
🍽️ Step 5: Serve with Warm Dipping Sauces
While the wings rest, melt the 0.5 cup butter in a small saucepan over low heat. Stir in 1 tbsp lemon juice and 1 tbsp paprika for a quick garlic butter sauce. Serve the wings hot with this sauce, ranch dressing, or your favorite dipping sauce of choice.
For the best results, serve immediately while the wings are at their crispiest. The double-fry method ensures that crunch lasts through the entire meal—no sad, greasy wings here! Enjoy with celery sticks and carrot sticks for the classic game-day experience.
Pro Tips For Making Basic Fried Chicken Wings
- Pat the Wings Dry: Skip the paper towels—patting them with a clean kitchen towel works faster, and you’ll get every last drop of moisture off. Wet skin = soggy crust, and nobody wants that. I learned this the hard way after frying a batch that came out more "damp" than crispy.
- Use Room-Temp Eggs: Crack the eggs into a bowl and let them sit for 10 minutes before dipping. Cold eggs won’t cling as well, and your coating will end up lumpy instead of smooth. Trust me, it’s worth the wait—your wings will thank you with a better seal.
- Fry in Batches, Not Crowds: Drop in 6-8 wings at a time, max. Cramming the pan lowers the oil temp, and suddenly you’re dealing with greasy, unevenly cooked wings instead of golden, crispy ones. I used to rush this, and the results were always hit-or-miss.
- Butter the Oil, Not the Wings: Add 2 tablespoons of melted butter to the hot oil right before frying—it’ll infuse flavor without making the wings greasy. Drizzling it over the wings after frying is a waste; the butter burns off too fast. (Yes, even if you’re impatient like me.)
Make-ahead tips for this dish
Brine Ahead
The real secret to juicy wings starts with the brine. I always prep the wings the night before—simply toss them in the brine mixture and let them sit in the fridge overnight. This not only seasons them deeply but also tenderizes the meat for that perfect texture. If you're short on time, 4 hours minimum in the fridge still works wonders. Just
Coat & Freeze
Here's a game-changer: after coating your wings with flour, egg wash, and paprika, place them on a baking sheet lined with parchment paper. Pop them in the freezer for 30 minutes before frying. The cold temperature helps the coating adhere better and prevents it from falling off during the frying process. This step is especially helpful if you're prepping a big batch for a party—just freeze the coated wings on a tray, then transfer them to a freezer bag for up to 1 month. Thaw completely before frying.
Oil Prep
Never skimp on oil quality or quantity. For make-ahead frying, I recommend using a deep fryer or heavy pot with at least 3 inches of oil—this ensures the wings fry evenly without splattering. Preheat your oil to 350°F for the first fry and 375°F for the second. If you're prepping ahead, you can even preheat the oil in your deep fryer and keep it at the correct temperature until you're ready to fry. Use a thermometer—this is non-negotiable for consistent results. 🔥
Batch Frying
To avoid overcrowding, fry your wings in batches of 8-10 wings per fryer load. This ensures they cook evenly and develop that perfect golden-brown crust. If you're making a big batch, I suggest frying half the wings first, then let them rest while you finish the second batch. Keep the cooked wings warm in a 200°F oven on a wire rack—this maintains crispiness while you finish frying. Pro tip: Use tongs to handle the wings, not your hands, to avoid burning yourself and to keep the coating intact.
Storage & Reheating
Store leftover wings in an airtight container lined with a paper towel to absorb excess grease. They'll stay fresh in the fridge for 3 days. To reheat, bake at 375°F for 10-12 minutes on a wire rack (not a plate) to restore that crispy texture. For a quick fix, you can also reheat them in the air fryer at 375°F for 5-6 minutes. Avoid microwaving—it turns the coating soggy. If you're freezing the wings, do it before frying. Place them on a tray, freeze solid, then transfer to a freezer bag. Cook from frozen, adding 2-3 extra minutes to each fry time.
Sauce Prep
Make your dipping sauces ahead of time to save stress during serving. The garlic butter sauce from the recipe can be made 2 days in advance and stored in the fridge. For ranch or blue cheese dressing, buy pre-made or whip up a batch and keep it chilled. I also love making a quick honey mustard sauce by mixing 2 tbsp Dijon mustard, 2 tbsp honey, and 1 tbsp apple cider vinegar—it keeps well in the fridge for 5 days. Warm your sauces slightly before serving to enhance their flavors and make dipping even more enjoyable. ✨
Nutrition facts
Frequently asked questions
Why do I need to double-fry the wings?
The double-fry method is what creates that legendary crunch that lasts all night. The first fry at 350°F cooks the wings through while keeping the coating light, and the second fry at 375°F locks in that satisfying crunch. This two-step process prevents soggy wings and ensures maximum texture contrast between the crispy exterior and juicy interior.
Can I use an air fryer instead of deep-frying?
Yes! For an air-fried version, spray the wings with oil after coating and air fry at 400°F for 12-15 minutes, shaking the basket every 5 minutes. While not exactly the same as deep-frying, they'll still be crispy and delicious. Just expect a slightly different texture—more like oven-baked but still satisfying. The double-coating technique still applies for best results.
What's the best way to keep the wings crispy while serving?
Place the cooked wings on a wire rack in a 200°F oven while you finish frying the rest. This keeps them warm and maintains that crispy texture. For serving, arrange them on a platter with paper towels underneath to absorb any excess oil. Avoid stacking them, as this can make the bottom wings soggy.
How do I prevent the coating from falling off?
Pat the wings completely dry after brining—this is the #1 reason coatings fail. Also, freeze the coated wings for 30 minutes before frying (see make-ahead tips). This helps the coating adhere better. Don't overcrowd the fryer, and work in small batches to ensure even cooking and a secure coating.
Can I make these wings ahead of time for a party?
Freeze the coated wings on a tray, then transfer to a bag for up to 1 month. Cook from frozen, adding 2-3 extra minutes to each fry time. For reheating, bake at 375°F for 10-12 minutes on a wire rack to restore crispiness. The flavor actually improves after resting overnight—perfect for make-ahead entertaining!