
Main Courses
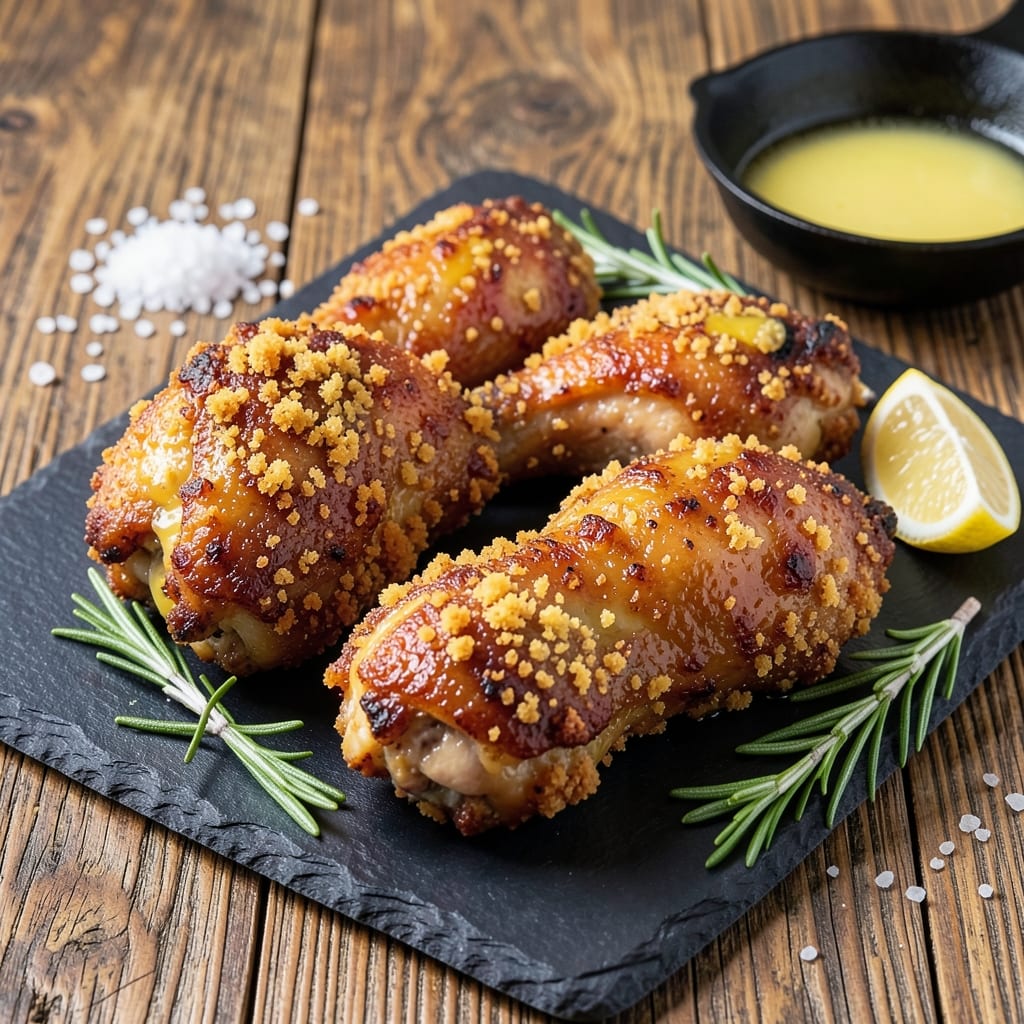
This baked fried chicken recipe delivers juicy magic without deep-frying—just crispy, double-crusted perfection. 💛 I developed it after years of perfecting Nana Mae's diner-style technique, using bread crumbs for that signature crunch while keeping the meat tender inside. The secret? A two-step breading process that creates an irresistible texture without the mess of traditional frying.
What makes this recipe stand out is the balance between crispiness and moisture. We start with a well-seasoned brine that locks in flavor, then coat the chicken in a mix of panko and all-purpose flour for maximum crunch. Baking at high heat ensures that golden, shatteringly crispy crust while keeping the meat juicy—a challenge most home cooks struggle with. The double-crust method, inspired by Southern traditions, delivers that iconic fried chicken texture without the oil splatter.
By the time it emerges from the oven, you'll have a dish that rivals your favorite fried chicken joint—juicy inside with a crispy, caramelized exterior that holds up perfectly. The bread crumbs create a satisfying crunch in every bite, while the seasoning blend adds depth that makes this more than just a baked version. This is comfort food elevated, with all the nostalgia of Sunday dinners but none of the guilt.
The best part? This recipe scales beautifully for family gatherings or meal prep. Serve with classic sides like mashed potatoes, collard greens, or a fresh garden salad. The leftovers reheat surprisingly well, making it a practical choice for busy weeks. Let's get to that crispy, juicy perfection.
Ingredients for baked fried chicken recipe with bread crumbs
A perfect blend of juicy chicken and crispy bread crumbs for that iconic diner-style crunch.
| Ingredient | Amount | Notes |
|---|---|---|
| Boneless, Skinless Chicken Thighs 🍗 | 1 ½ lb | Cut into even pieces |
| All-Purpose Flour 🌾 | ½ cup | For dry coating |
| Japanese Panko Breadcrumbs 🍞 | 1 cup | For crispy texture |
| Large Eggs 🥚 | 2 whole | Beaten for egg wash |
| Butter, Unsalted 🧈 | ¼ cup | Melted for basting |
| Kosher Salt 🧂 | 1 ½ tsp | For seasoning and brine |
| Ground Black Pepper 🌶️ | 1 tsp | Freshly ground |
| Garlic Powder 🧄 | 1 tsp | For flavor depth |
| Onion Powder 🧅 | 1 tsp | For savory base |
| Paprika 🌶️ | 1 tsp | Smoked for color |
| Cornstarch 🌾 | 1 tbsp | For extra crispiness |
| Vegetable Oil 🫒 | ½ tbsp | For greasing pan |
| Buttermilk 🥛 | ½ cup | For marinating |
The chicken thighs are the heart of this recipe—bone-in, skin-on if you can find them, but boneless works too. Trader Joe's and Costco often carry pre-cut thighs, but check the meat section for the freshest pieces. Look for thighs with good marbling—they'll stay juicier while baking. The buttermilk marinade is non-negotiable; it tenderizes the meat and adds that signature tang. If you're short on time, a quick brine with 1 cup buttermilk + 1 tsp salt for 30 minutes works in a pinch.
No panko? Toasted breadcrumbs from your own bread will work—just pulse stale bread in a food processor until fine. The cornstarch is key for that extra crunch; if you're out, add an extra 1 tbsp flour to the dry mix. For the seasoning blend, Penzeys or McCormick have solid pre-mixed options, but homemade lets you adjust heat levels. The melted butter basting? Don't skip it—it's what turns 'good' into 'restaurant-quality'. If you're watching calories, use olive oil spray instead of butter for basting.
Prep ahead by marinating the chicken overnight for maximum flavor. Store the breadcrumb mix in an airtight container for up to 3 days—it keeps perfectly in the pantry. The baked chicken reheats beautifully; pop it in a 350°F oven for 10-15 minutes with foil to revive the crispiness. For meal prep, assemble the chicken but don't bake it until serving—this keeps the coating from getting soggy. Portion into airtight containers with parchment paper between layers to maintain that crispy texture for 3-4 days in the fridge.
Why You'll Love This Recipe
- No-Fuss Coating: I swear by the flour-egg-panko combo—it sticks like glue but takes zero effort. Pat the thighs dry, toss in flour, dip in egg, then press panko until it clings. That’s it. No messy deep-fryer, no fiddling with temp gauges.
- Crisp Without Grease: The butter melt in the oven creates that golden, shatterable crust while keeping the inside juicy. Honestly, it’s the closest I’ve gotten to takeout fried chicken without the guilt—or the oil splatter on my walls.
- Lunchbox Hero: Between us, these reheat beautifully for packed lunches. Toss a few in a container with a side salad, and you’ve got a meal that’ll still taste crispy by tomorrow. My kid’s school lunchbox has never been this popular.
- Budget Crunch Saver: Chicken thighs stretch further than breasts, and panko costs next to nothing. I’ve made a full meal for four for under $12—plus, leftovers reheat like they’re fresh. That’s dinner covered for days.
Step-by-step instructions for baked fried chicken with crispy breadcrumbs
Here's the method for achieving that perfect balance of crispy crust and juicy meat every time.
👨🍳 Step 1: Marinate the Chicken in Buttermilk
Place the 1.5 lb boneless, skinless chicken thighs in a shallow dish or resealable bag. Pour the 0.5 cup buttermilk over the chicken, ensuring each piece is fully coated. Add 1.5 tsp kosher salt, 1 tsp garlic powder, 1 tsp onion powder, and 1 tsp paprika. Gently toss to distribute the seasoning evenly.
Cover and refrigerate for at least 4 hours or overnight for maximum flavor penetration. The buttermilk tenderizes the meat while the seasoning creates a flavorful base. You'll know it's ready when the chicken absorbs the liquid and develops a slightly sticky surface.
👨🍳 Step 2: Create the Double-Crust Breading
In a medium bowl, whisk together the 2 whole large eggs until fully combined. In another shallow dish, combine the 0.5 cup all-purpose flour with 1 tbsp cornstarch and 1 tsp ground black pepper. In a third dish, place the 1 cup Japanese panko breadcrumbs. This three-stage breading ensures maximum crunch and adhesion.
Real talk: the cornstarch is what creates that extra crispy texture we're after. Don't skip it—this is the secret to that restaurant-quality crunch. Keep all three stations nearby for efficient breading.
🍳 Step 3: Bread the Chicken Thoroughly
Remove the chicken from the buttermilk and let any excess drip off. Working in batches if needed, dredge each piece in the flour mixture, pressing gently to adhere. Shake off any excess, then dip into the beaten eggs, allowing any excess to drip off. Finally, press each piece into the panko breadcrumbs, coating completely on all sides.
For the best results, I press down firmly on each piece during the panko stage—this prevents air pockets and ensures even coating. Lay the breaded chicken on a wire rack set over a baking sheet to allow air circulation on all sides. This prevents soggy spots where the chicken touches the pan.
🔥 Step 4: Bake to Golden Perfection
Preheat your oven to 400°F and lightly grease a baking sheet with 0.5 tbsp vegetable oil. Arrange the breaded chicken pieces on the prepared sheet, leaving 1 inch between each piece for proper air circulation. Melt the 0.25 cup unsalted butter and brush it evenly over the breaded chicken.
Bake for 25-30 minutes until the chicken reaches an internal temperature of 165°F and the breading is deep golden brown with crispy edges. Here's the thing—your oven might run hot, so start checking at the 25-minute mark. If it starts browning too quickly, tent with foil to prevent burning while it finishes cooking.
⏰ Step 5: Rest and Serve
Transfer the baked chicken to a wire rack and let it rest for 5 minutes before serving. This resting period allows the juices to redistribute, ensuring each bite is moist and flavorful. The breading will stay crispy during this time, so don't skip this step—it's what separates good fried chicken from great fried chicken.
Serve immediately with your favorite dipping sauces or sides. Each piece should have a perfectly crispy, double-layered crust that shatters when you bite in, revealing the juicy, tender chicken beneath. That's the magic of this double-crust technique.
Pro Tips For Making Baked Fried Chicken Recipe With Bread Crumbs
- Pat the thighs hard: Chicken thighs release water when cooked, and if you skip this, your crust will turn into sad, soggy paste. Grab paper towels and press each thigh like you’re trying to flatten a pancake—this guarantees a crispy, golden shield instead of a mushy mess. (Yes, it’s tedious, but trust me, your future self will notice.)
- Use cold butter: I learned this the hard way—melting butter in the pan first leads to uneven browning and a greasy finish. Instead, cut that cold unsalted butter into chunks and toss it with the panko before baking. The butter will melt just enough to crisp the breadcrumbs while keeping the chicken juicy. (And no, you can’t just use oil. Butter makes the difference.)
- Don’t overcrowd the pan: Stacking thighs too close to each other steams them instead of browning. Arrange them in a single layer with space between each piece—even if it means baking in batches. Crowding turns your golden crust into a sad, pale blob, and nobody wants that. (Pro move: Use a wire rack over a baking sheet to let air circulate.)
- Mix flour with salt first: Sounds weird, but it works: Toss your all-purpose flour with a generous pinch of salt (about ½ teaspoon per cup) before dredging the thighs. This ensures every bite has flavor, not just the crust. I used to just season the chicken—big mistake. The flour acts like a flavor multiplier, and your dish will taste noticeably better. (No extra steps, just a 10-second fix.)
Creative variations of this dish
Southern-Style Crunch
For that classic Southern diner crunch, mix ½ cup crushed Ritz crackers with the panko and 1 tbsp extra cornstarch for a finer, more delicate coating. I learned this trick from Nana Mae—she'd always add a pinch of cayenne pepper for subtle heat. Serve with homemade white BBQ sauce (just mayo, vinegar, and a touch of sugar) for that true Southern experience. 🌶️
Spicy Nashville Hot
Transform this into Nashville Hot Chicken by adding 2 tbsp cayenne pepper to the buttermilk marinade and 1 tbsp hot sauce (like Cholula) to the egg wash. After baking, brush with a mix of ½ cup melted butter and 2 tbsp cayenne while still hot. Let it cool slightly before serving—trust me, the heat builds as it cools. 🔥
Herb-Infused Mediterranean
Swap the Southern spices for 1 tsp dried oregano, 1 tsp dried thyme, and ½ tsp lemon zest in the buttermilk. Use ½ cup crushed semolina instead of cornstarch for the dry coating, and finish with a sprinkle of fresh parsley. Serve with a tzatziki drizzle and warm pita bread for a Mediterranean twist that still delivers that crispy magic. 💛
Buffalo Wing Fusion
Bake the chicken as directed, then toss the hot pieces in ½ cup melted butter, 3 tbsp hot sauce (like Frank's RedHot), and 1 tbsp honey for a sticky-sweet buffalo glaze. Serve with blue cheese dressing and celery sticks for a crispy, spicy, tangy combo that's perfect for game day. This variation became a hit at our Super Bowl parties—David still asks for seconds! 🏈
Gluten-Free Crispy
For a gluten-free version, replace the flour and panko with ½ cup gluten-free all-purpose flour and 1 cup gluten-free panko (like Schär). Add 1 tbsp arrowroot powder to the dry mix for extra crispiness. The buttermilk marinade remains the same, ensuring that tender texture. This version works perfectly for guests with gluten sensitivities while still delivering that satisfying crunch. 💪
Sweet & Sticky Honey-Glazed
After baking, brush the chicken with ¼ cup honey mixed with 1 tbsp Dijon mustard while still hot. Let it caramelize for 2-3 minutes under the broiler for a sticky, sweet glaze. Garnish with toasted pecans for crunch. This version pairs beautifully with mashed sweet potatoes and apple slices for a sweet-and-savory meal that feels like a dessert. 🍯
Nutrition facts
Frequently asked questions
Can I use chicken breasts instead of thighs?
Chicken breasts work but require extra care—they dry out faster. If using them, brine for 2 hours instead of marinating, and bake at 375°F for 20-25 minutes to prevent overcooking. Pound them to even thickness first for consistent doneness.
Why is my breading falling off?
This usually happens when the chicken isn't fully dry before breading or the coating isn't pressed firmly. Pat pieces completely dry after buttermilk, and press the panko layer with your fingers—this creates a stronger bond. Also ensure your egg wash is thick enough to adhere properly.
Can I make this ahead of time?
Bread the chicken and refrigerate for up to 24 hours before baking. Store in an airtight container with parchment between layers. When ready to bake, increase time by 5-10 minutes to account for cold start. The double-crust stays crispy when reheated properly.
What's the best way to reheat leftovers?
For maximum crispiness, reheat in a 400°F oven for 8-10 minutes on a wire rack. Avoid microwaving—it makes breading soggy. If using air fryer, cook at 375°F for 3-4 minutes to restore crunch without drying the meat.
Can I substitute panko with regular breadcrumbs?
Regular breadcrumbs work but won't be as crispy. For best results, pulse stale bread in a food processor until fine, then toast in a dry pan for 3-5 minutes until golden. Mix with cornstarch (1:1 ratio) to improve crispiness—this mimics panko's airy texture.