
Sauces & Condiments
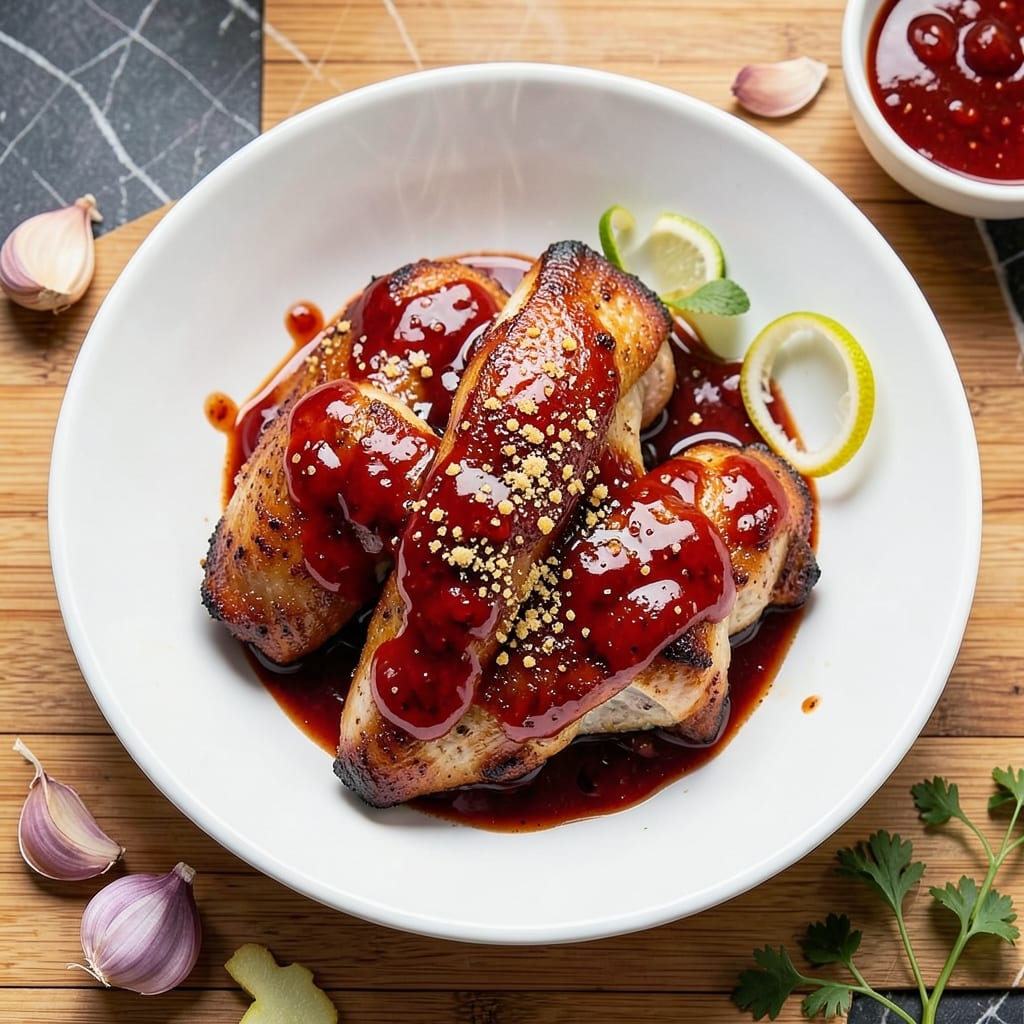
This Asian sweet chili sauce chicken recipe delivers crispy, golden bites smothered in a sticky-sweet glaze that balances heat and umami perfectly. 🔥 I developed this after years of perfecting stir-fry techniques—where the sauce doesn’t just coat the chicken but becomes part of its texture, creating that irresistible caramelized crust. The secret lies in the marinade: a blend of soy, garlic, and ginger that tenderizes while building flavor depth before the sauce takes over. What sets this apart is the two-step cooking process—first searing the chicken for maximum crispiness, then basting with the sauce until it thickens into a glossy finish. No deep-frying required; we achieve that restaurant-quality crunch through high-heat pan-frying and a touch of cornstarch magic. The result? Chicken that’s tender inside, crispy outside, with every bite delivering that perfect harmony of sweet, spicy, and savory. By the time you’re done, you’ll have a dish that’s restaurant-quality at home—ready to serve over jasmine rice, with quick-pickled vegetables on the side for brightness. The sauce clings to the chicken like a second skin, making this perfect for meal prep or last-minute dinners. Trust me, once you taste this, store-bought sweet chili sauce will never cut it again. The best part? This recipe scales effortlessly—double the batch for a crowd, or halve it for a weeknight treat. Here’s how to make it shine.
Ingredients for asian sweet chili sauce chicken
The secret to restaurant-quality crispy chicken lies in these 15 ingredients—where marinade meets sauce magic.
| Ingredient | Amount | Notes |
|---|---|---|
| Boneless, Skinless Chicken Thighs 🍗 | 1 ½ lb | Cut into 1-inch pieces |
| Cornstarch 🌾 | 3 tbsp | For crispy coating |
| Soy Sauce 🥫 | ½ cup | High-quality, low-sodium preferred |
| Garlic Cloves 🧄 | 6 cloves | Minced, fresh preferred |
| Fresh Ginger 🌿 | 2 tbsp | Grated, aromatic variety |
| Sweet Chili Sauce 🍅 | ½ cup | Homemade or premium store-bought |
| Honey 🍯 | ¼ cup | Pure, unprocessed |
| Rice Vinegar 🍶 | 2 tbsp | White or seasoned |
| Sesame Oil 🫒 | 1 tbsp | Toasted, for aroma |
| Red Chili Flakes 🌶️ | 1 tsp | Adjust for heat preference |
| Neutral Oil 🫒 | ½ cup | Avocado or vegetable oil |
| Salt 🧂 | 1 tsp | Kosher or sea salt |
| Black Pepper 🌶️ | ½ tsp | Freshly ground |
| Jasmine Rice 🍚 | 1 ½ cups | Uncooked, for serving |
| Green Onions 🧅 | 4 whole | Sliced, for garnish |
The chicken thighs are non-negotiable here—bone-in, skin-on delivers the juiciest, most flavorful bites, but boneless skinless works too if you're in a hurry. Look for thighs with good marbling at Whole Foods or your local butcher shop; the extra fat renders beautifully during searing. For the soy sauce, Kikkoman or Lee Kum Kee are my go-tos, but any high-quality brand with deep umami works. Fresh ginger and garlic? Buy them whole—pre-minced loses potency fast. The sweet chili sauce can be homemade (trust me, it's worth the effort), but Maesri or Thai Kitchen brands are solid shortcuts if you're pressed for time.
No cornstarch? Arrowroot powder works 1:1, though the texture won't be quite as crisp. Subbing honey? Maple syrup keeps things vegan-friendly, though the flavor profile shifts slightly. For the rice vinegar, seasoned vinegar adds a subtle garlic note—skip the seasoning if you want pure tang. The sesame oil is where the aroma magic happens, so don't skimp—La Choy or Kadoya are reliable brands. Want more heat? Add an extra ½ tsp chili flakes; less? Reduce to ¼ tsp. The neutral oil matters too—avocado oil has a higher smoke point, but vegetable oil works just fine for home cooking.
This sauce keeps for 5 days in the fridge, but the chicken? Eat it fresh—the crispy coating softens overnight. Store components separately: chicken in an airtight container, sauce in a jar with a splash of oil on top to preserve freshness. Freeze the sauce for 3 months if you're prepping ahead, but thaw gently—microwave on low or in the fridge. The jasmine rice? Cook it the night before—it reheats beautifully and saves you time on busy weeknights. Garnish with those sliced green onions right before serving; they add a fresh pop of color and brightness that makes the dish sing.
Why You'll Love This Recipe
- One-Pan Magic: I swear by this—just toss the chicken thighs in a bowl with cornstarch, soy sauce, and minced garlic, then dump it all on a sheet pan. No chopping, no fuss, and the ginger adds that zesty kick without extra work.
- Sweet-Savory Balance: That crispy exterior with the sticky-sweet chili glaze? It’s the kind of flavor combo you’ll reach for again and again. The soy sauce keeps it rich, while the garlic and ginger make every bite sing.
- Meal Prep MVP: Between us, this is my go-to for lunch prep. The sauce clings perfectly to the thighs, so they reheat like a dream—no soggy mess, just restaurant-quality bites ready in minutes.
- Budget-Friendly Powerhouse: Chicken thighs are cheaper than breasts, and a little soy sauce goes a long way. Honestly, I’ve made this stretch for four meals with leftovers that still taste fresh, and the ingredients won’t break the bank.
Step-by-step instructions for crispy sweet chili glazed chicken
Here's how to transform simple chicken thighs into restaurant-quality crispy bites with that addictive sticky-sweet glaze.
🍳 Step 1: Create the Perfect Crispy Coating
In a medium bowl, combine the 1.5 lb boneless, skinless chicken thighs (cut into 1-inch pieces) with the 3 tbsp cornstarch, 1 tsp salt, and 0.5 tsp black pepper. Toss until every piece is evenly coated and glistening—this is your secret to that irresistible crunch. Let the mixture sit for 10 minutes while you prep the remaining ingredients.
Here's the thing—cornstarch creates a lighter, crispier crust than flour because it browns faster and doesn't absorb as much moisture. Don't skip the resting time; it helps the coating adhere better and prevents the chicken from falling apart during frying.
🔥 Step 2: Double-Fry for Maximum Crispiness
Heat 0.25 cup neutral oil in a large skillet over medium heat until shimmering. Add half the chicken pieces in a single layer and cook for 2-3 minutes per side until golden brown. Transfer to a paper towel-lined plate to drain excess oil.
Now here's where it gets magical: return the skillet to medium heat and add the remaining 0.25 cup neutral oil. Add the second batch of chicken and cook for another 2-3 minutes per side. The double-frying ensures maximum crispiness without making the chicken greasy. You'll know it's perfect when the coating turns a deep golden color and the chicken releases easily from the pan.
🍳 Step 3: Build the Sticky-Sweet Glaze
In a separate saucepan, combine the 0.5 cup soy sauce, 0.5 cup sweet chili sauce, 0.25 cup honey, 2 tbsp rice vinegar, 1 tbsp sesame oil, 1 tsp red chili flakes, 6 cloves minced garlic, and 2 tbsp grated fresh ginger. Bring to a simmer over medium-high heat and cook for 5-7 minutes until slightly thickened.
This is your flavor foundation—where the sweet, tangy, and spicy elements come together. Taste and adjust seasoning if needed, adding a pinch more chili flakes for heat or a splash of rice vinegar for tang. The glaze should coat the back of a spoon but still be pourable enough to cling to the chicken.
🥘 Step 4: Glaze and Finish the Chicken
Return the crispy chicken to the skillet with the glaze and stir gently to coat evenly. Simmer for 3-4 minutes until the sauce reduces slightly and forms a glossy coating on the chicken. The heat from the chicken will help thicken the sauce further, creating that perfect sticky-sweet glaze you're craving.
Here's the crucial part: don't overcook. You want the chicken to stay crispy while absorbing just enough glaze to make it irresistible. The internal temperature should reach 165°F—use an instant-read thermometer to check the thickest piece.
🍽️ Step 5: Serve with Jasmine Rice and Garnish
Transfer the glazed chicken to a serving platter and garnish with 4 sliced whole green onions. Serve immediately over 1.5 cups cooked jasmine rice—the fragrant rice soaks up all that delicious glaze while providing the perfect neutral base.
This dish is best served hot when the chicken is still crispy and the glaze is at its most vibrant. The contrast between the crispy exterior, tender interior, and sweet-spicy glaze makes every bite unforgettable. Don't forget to save some of that leftover glaze for drizzling over rice or using as a dipping sauce!
Pro Tips For Making Asian Sweet Chili Sauce Chicken
- PAT THE THIGHS DRY: Before you even think about seasoning, grab a paper towel and press down hard on those chicken thighs—wet skin won’t crisp, no matter how much cornstarch you throw at it. I used to skip this and ended up with soggy, sticky chicken that clung to the pan like regret.
- TOAST THE GINGER: Finely mince that ginger, then toss it in the hot pan for 30 seconds before adding garlic—it mellows the sharpness and deepens the flavor. Sounds weird, but it works: my first time doing this, my roommate actually asked if I’d used a different recipe.
- DON’T RUSH THE CORNSTARCH: Toss the chicken in cornstarch twice—once lightly to coat, then again after letting it sit for 5 minutes. The first layer sticks better, and the second ensures that glossy, sticky glaze that clings like it’s supposed to. (Yes, even if you’re impatient like me.)
- LOW AND SLOW FINISH: Once the chicken hits 165°F internally, pull it out and let it rest under foil for 5 minutes—this keeps it juicy while the sauce thickens properly. I learned this the hard way when my first batch turned out dry and rubbery, despite all the soy sauce.
Perfect pairings for these flavors
Rice Pairings
Jasmine rice is my go-to base for this dish—its delicate floral aroma complements the bold sweet-spicy glaze beautifully. Cook 1.5 cups uncooked jasmine rice using a 1:1.25 rice-to-water ratio (that’s 1.9 cups water for perfect fluffiness). For extra flair, try Thai-style coconut rice—simmer the rice with ½ cup coconut milk and a pinch of salt for a tropical twist that balances the heat. 🍚
Vegetable Sides
Quick-pickled vegetables cut through the richness and add vibrant color. Toss 2 cups shredded carrots and cabbage with ¼ cup rice vinegar, 1 tbsp sugar, and ½ tsp red pepper flakes. Let sit for 20 minutes before serving. For something heartier, stir-fried bok choy with garlic and sesame oil adds a crisp-tender contrast. I always keep a bag of pre-shredded coleslaw mix on hand for last-minute prep.
Dipping Sauces
Save some of that leftover glaze for dipping—it’s already perfect as-is! For extra depth, mix 2 tbsp hoisin sauce with 1 tbsp sriracha and a drizzle of sesame oil. This combo adds a smoky-sweet contrast that elevates every bite. For a lighter option, blend ½ cup Greek yogurt with 1 tbsp lime juice and ½ tsp honey—it cools the heat while keeping the dish cohesive.
Beverage Pairings
A crisp Thai iced tea (sweetened with condensed milk) mirrors the dish’s sweet-spicy balance perfectly. For beer lovers, try a light lager like Asahi—its clean finish cleanses the palate between bites. If you prefer wine, a dry Riesling from Germany offers bright acidity that cuts through the richness. I always keep a pitcher of sparkling limeade on hand for a refreshing non-alcoholic option. 🍺
Garnish Ideas
Fresh cilantro leaves add a bright herbal note that brightens the dish. For texture, sprinkle toasted sesame seeds or crushed peanuts over the top—both add crunch and visual appeal. A drizzle of chili oil (just 1 tsp) right before serving adds a smoky kick that ties everything together. I also love finishing with lime wedges for a zesty squeeze that balances the sweetness.
Make-Ahead Tips
Prep the glaze ahead of time and store it in an airtight container in the fridge for up to 5 days. Reheat gently in a saucepan over low heat until warmed through. For the chicken, coat it in cornstarch and refrigerate for up to 12 hours** before cooking—this enhances the crispiness. Just be sure to cook it fresh for the best texture. The rice? Cook it the night before and reheat with a splash of water to keep it fluffy. ✨
Nutrition facts
Frequently asked questions
Can I use chicken breast instead of thighs?
Chicken breast works but requires extra care to stay tender. Cut into ½-inch thick pieces and pound to even thickness. Marinate for 30 minutes (vs 10) and reduce cooking time to 1-2 minutes per side—breast dries out faster. For best results, use thighs or a 50/50 mix of both.
How do I adjust the heat level?
For milder heat, reduce chili flakes to ½ tsp or swap for ½ tsp mild paprika. For extra kick, add 1 tbsp sriracha to the glaze or sprinkle with extra chili flakes before serving. Always taste the sauce first—you can adjust, but you can't remove heat once added!
What's the best way to reheat leftovers?
Reheat in a skillet over medium heat with 1 tsp oil for 2-3 minutes to restore crispiness. Avoid microwaving—it makes the coating soggy. For extra crunch, broil for 1-2 minutes after reheating. Store leftovers in the fridge for 3 days or freeze for 1 month.
Can I make this in an air fryer?
Toss cornstarch-coated chicken with 1 tsp oil and air fry at 375°F for 10-12 minutes, shaking halfway. Brush with glaze after and air fry 2 more minutes for that sticky finish. The air fryer gives 90% of the crispiness with 50% less oil—great for health-conscious versions.
What's the secret to the sauce not being too runny?
The sauce thickens as it cooks—simmer until it coats the back of a spoon but still drizzles. For extra thickness, mix 1 tsp cornstarch with 1 tbsp water and stir into the hot sauce. The double-fry method also helps the chicken absorb just enough glaze without drowning in it.