
Sauces & Condiments
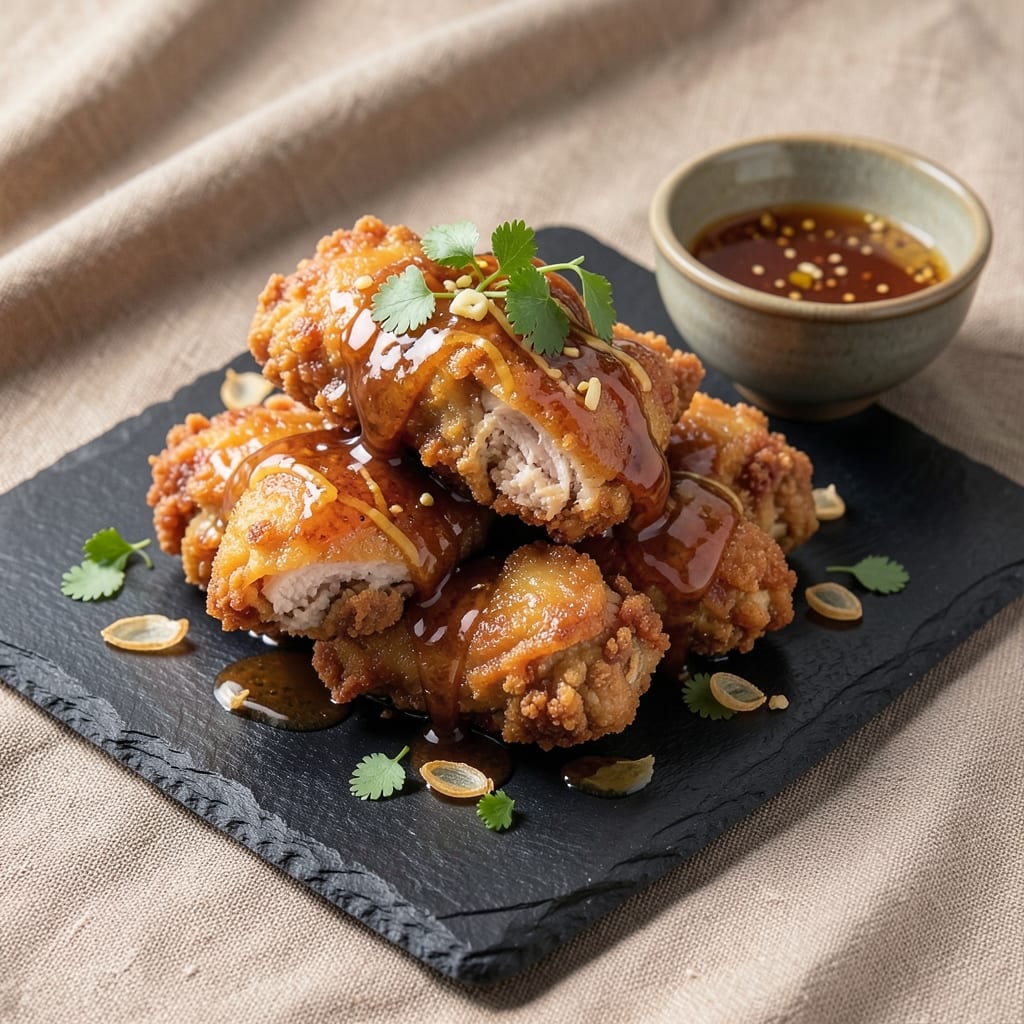
This Asian fried chicken sauce recipe transforms ordinary crispy bites into addictive, sticky-sweet masterpieces with just 10 minutes of simmering. 🔥 The perfect balance of umami from soy sauce, heat from chili, and natural sweetness from honey creates a glaze that clings to every crispy edge while keeping the interior juicy. I developed this sauce after years of testing—it's the one that finally made my homemade fried chicken taste like a Korean BBQ joint.
The secret lies in the flavor layers: toasted garlic and ginger add aromatic depth, while a splash of rice vinegar brightens the sauce without overpowering. What makes this recipe truly foolproof is the simmering technique—reducing the sauce until it reaches that perfect sticky consistency where it coats the chicken without drowning it. The sauce also doubles as a dipping sauce, making it versatile for appetizers or meal prep.
By the end, you'll have a glossy, caramelized glaze that's sweet enough to satisfy cravings but with just enough heat to keep things exciting. The sauce keeps well in the fridge for up to a week, making it perfect for batch cooking. Whether you're serving up golden-crispy chicken wings or tenders, this sauce elevates every bite with that signature Asian restaurant flavor.
Ready to make your fried chicken unforgettable? Here's everything you need to create this restaurant-quality glaze at home.
Ingredients for asian fried chicken sauce
Ten ingredients, one magical sauce. Sweet, spicy, and sticky perfection for your crispy bites.
| Ingredient | Amount | Notes |
|---|---|---|
| Soy Sauce 🍶 | ½ cup | High-quality, preferably Japanese |
| Honey 🍯 | ⅓ cup | Pure, thick variety preferred |
| Rice Vinegar 🍶 | ¼ cup | White or seasoned works |
| Sesame Oil 🫒 | 1 tbsp | Toasted, not flavored |
| Garlic Cloves 🧄 | 4 cloves | Toasted until golden |
| Fresh Ginger 🌿 | 2 tbsp | Grated, peeled |
| Gochujang 🌶️ | 2 tbsp | Korean fermented chili paste |
| Sriracha 🌶️ | 1 tbsp | Adjust for spice preference |
| Brown Sugar 🍚 | 2 tbsp | Packed, light variety |
| Water 💧 | ¼ cup | Room temperature |
The soy sauce is your umami foundation—Kikkoman or Japanese shoyu if you can find it. The honey should be thick and pure (no corn syrup nonsense), and rice vinegar adds that bright tang that cuts through the sweetness. Toasting the garlic and ginger in a dry pan until fragrant unlocks their full flavor—don’t skip this step! For the heat, gochujang gives that deep, fermented kick, while sriracha adds the bright red color. I grab mine from the Asian aisle at Trader Joe’s or H Mart—both carry quality versions. The sesame oil should be toasted, not flavored, for that nutty aroma.
No gochujang? Sriracha plus a pinch of smoked paprika gets you close, though the flavor won’t be identical. Short on honey? Maple syrup works in a pinch (same amount), but it won’t caramelize as beautifully. The brown sugar helps balance the acidity—don’t sub white sugar unless you want a less complex flavor. For extra depth, add 1 tsp of fish sauce (if you’re not avoiding it), but it’s optional. The water is just for thinning if needed—start with less and add more if the sauce gets too thick. Fresh ginger? Powdered works at half the amount, but fresh is worth the extra minute of grating.
This sauce gets better as it sits—let it cool and thicken for 10 minutes before using. Store in a glass jar in the fridge for up to 1 week, or freeze in ice cube trays for single-serving portions. Reheat gently on the stove, adding a splash of water if it thickens too much. Double the batch—you’ll want it for everything from fried chicken to dumplings!
Why You'll Love This Recipe
- Pantry Magic: I swear, this sauce comes together with stuff I already have—no fancy shopping trips. Just toss in soy sauce, a drizzle of honey, a splash of rice vinegar, and a few crushed garlic cloves. That’s it. The sesame oil ties it all together with zero effort.
- Umami Bomb: The garlic and soy sauce combo? Chef’s kiss. It’s sweet, salty, and tangy all at once, with that nutty sesame oil finish. Honestly, the first time I tasted it, I immediately grabbed more chicken to dunk.
- Weeknight Hero: This sauce works on takeout night, game day, or when you’re too tired to cook. Slather it on store-bought fried chicken, toss it with noodles, or drizzle it over rice—it’s the ultimate lazy but ridiculously satisfying fix.
- Budget Win: A single batch stretches for days, and the ingredients cost pennies. I make a double batch on Sundays, then use it all week—no waste, no stress. (Yes, even on a Tuesday night.)
Step-by-step instructions for sweet-spicy umami glaze
This sauce transforms ordinary fried chicken into a sticky, flavor-packed masterpiece. Let's make it shine!
🍳 Step 1: Toast the Aromatics for Deep Flavor
Heat a small skillet over medium heat and add the 4 cloves garlic cloves and 2 tbsp fresh ginger. Toast them for 3-4 minutes, stirring constantly, until the garlic turns golden brown and fragrant. You'll smell that nutty, caramelized aroma—this is where the magic starts!
Watch closely—ginger burns faster than garlic. If it starts to darken too quickly, reduce the heat slightly. Once toasted, remove the pan from heat and let the aromatics cool for 2 minutes. This step builds complex flavors that regular raw garlic and ginger can't match.
🍳 Step 2: Build the Sauce Base
In a medium saucepan, combine the 0.5 cup soy sauce, 0.33 cup honey, 0.25 cup rice vinegar, 2 tbsp gochujang, 1 tbsp sriracha, and 2 tbsp brown sugar. Stir well to dissolve the sugar completely—this prevents grainy texture in your final glaze.
Place the saucepan over medium-low heat and bring to a gentle simmer. Let it bubble for 5 minutes, stirring occasionally. You'll see the mixture thicken slightly and develop a glossy sheen. This is your flavor foundation—don't rush it. The heat helps meld all those sweet, spicy, and umami notes together.
🥘 Step 3: Incorporate Toasted Aromatics and Oil
Add the toasted garlic and ginger to the saucepan along with the 1 tbsp sesame oil and 0.25 cup water. Stir everything together and let it simmer for another 5-7 minutes until the sauce thickens to a syrupy consistency—it should coat the back of a spoon but still be pourable.
Here's where it gets exciting: taste and adjust! Need more heat? Add a pinch more sriracha. Want it sweeter? A splash of honey. The sauce should balance sweet, spicy, tangy, and umami perfectly. If it's too thick, add 1-2 teaspoons of water at a time until you reach your ideal consistency.
⏰ Step 4: Cool and Thicken for Perfect Application
Remove the saucepan from heat and let the sauce cool for 10-15 minutes. This resting time allows the flavors to fully meld and the sauce to thicken slightly. The longer it sits, the better it becomes—don't skip this step!
Once cooled, give it one final stir. The sauce should now have that perfect glossy, slightly sticky texture that clings beautifully to crispy fried chicken. If you're not using it immediately, transfer to an airtight container and store in the refrigerator for up to 2 weeks—it actually tastes better after sitting overnight as the flavors deepen.
🍗 Step 5: Use Immediately for Maximum Impact
For best results, use the sauce while still warm. Drizzle it generously over freshly fried chicken—hot sauce over hot chicken ensures that perfect melt and crispy texture combination. The sauce will caramelize slightly from the chicken's heat, creating an irresistible sticky glaze.
Here's a pro tip: For extra drama, toss the fried chicken in the sauce while it's still in the fryer basket, then let it sit for 1-2 minutes before serving. This ensures every bite gets that perfect sauce coating. Serve immediately while the chicken is still crispy and the sauce is warm—this is when it tastes absolutely incredible!
Pro Tips For Making Asian Fried Chicken Sauce
- Simmer Garlic Low: I learned this the hard way—crisping garlic in oil first adds flavor but burns fast. Instead, add whole cloves to the sauce after it’s simmering, then mash them into the sauce at the end. The result? Nutty, aromatic depth without bitter char.
- Balance Vinegar Gradually: Rice vinegar’s acidity can overwhelm if you dump it all in at once. Start with half, taste, then add the rest. Want tangier? A splash of lime juice at the end cuts through sweetness better than extra vinegar—trust me, I’ve ruined batches by overdoing it.
- Strain the Honey: Store-bought honey often has sediment that clumps into the sauce, making it look (and taste) gritty. Strain it through a fine-mesh sieve before mixing—takes 30 seconds but saves you from scraping honey bits off your plate later.
- Finish with Sesame Oil: Add sesame oil last, off the heat, or it’ll cook off and disappear. A teaspoon drizzled in at the end gives that signature aroma without turning the sauce bitter. (Yes, even if you’re impatient like me.)
Make-ahead tips for asian fried chicken sauce
Batch Prep Strategy
Make a double batch of this sauce—it’s perfect for meal prep! The recipe scales perfectly, so simply double all ingredients and use a large saucepan (like a Calphalon 3-quart) for even cooking. Store the extra sauce in glass jars (I love Ball Mason jars) in the fridge for up to 2 weeks. The flavors actually deepen over time, so it’s even better the next day! 💪
Freezer-Friendly Tips
For long-term storage, freeze the sauce in ice cube trays—each cube makes a perfect single serving for dipping or drizzling. Once frozen, transfer cubes to a ziplock freezer bag and label with the date. Thaw overnight in the fridge or microwave for 20 seconds on 50% power to use immediately. The texture stays perfect—no weird separation! ❄️
Sauce Prep Timeline
Plan ahead by making the sauce 1-2 days before your fried chicken feast. The flavors meld beautifully during this time, and you’ll save precious cooking day stress. Store it in a cool, dark place (like your pantry) if using within 3 days—just bring it to room temperature before using. Pro tip: Warm it gently on the stove for 2-3 minutes before drizzling to maintain that glossy, sticky consistency. ⏰
Chicken Prep Hack
Marinate your chicken in ½ cup of the sauce for 30 minutes before frying for extra flavor infusion. Use a ziplock bag and refrigerate for easy storage. After frying, toss the chicken in the remaining sauce while still in the fryer basket—this ensures every bite gets that perfect glaze. The sauce will caramelize beautifully from the residual heat. 🍗
Reheating Leftovers
Reheat leftover fried chicken with sauce by placing it in a single layer on a baking sheet. Broil for 2-3 minutes on high heat to restore crispiness, then drizzle with warmed sauce. For stovetop reheating, use a nonstick skillet on medium heat for 3-4 minutes, adding 1 tbsp water to prevent sticking. The sauce will re-glaze perfectly! 🔥
Sauce Versatility
This sauce isn’t just for fried chicken—use it as a dipping sauce for spring rolls, a glaze for grilled meats, or even a marinade for tofu. Store extra sauce in small containers (like Rubbermaid 8-oz portions) for easy grab-and-go applications. The sticky, sweet-spicy profile works wonders on almost any protein! 💫
Nutrition facts
Frequently asked questions
Can I make this sauce without gochujang?
If you don't have gochujang, use 1 tbsp extra sriracha plus ½ tsp smoked paprika for depth. For a closer flavor, try 1 tbsp miso paste (white or red) mixed with 1 tsp gochugaru (Korean chili flakes)—this adds that signature fermented umami. Just reduce the sriracha by ½ tbsp to balance the heat.
How do I adjust the sweetness or spice level?
Start with small adjustments: for more sweetness, add 1 tbsp honey at a time; for extra heat, increase sriracha by ½ tbsp or add ½ tsp cayenne pepper. To reduce sweetness, swap 1 tbsp honey for 1 tbsp rice vinegar. Always taste as you go—this sauce is highly customizable!
Can I use this sauce for other proteins besides chicken?
Yes! This glaze works beautifully on pork ribs, beef skewers, or even tofu. For pork, reduce the honey to ¼ cup (pork is naturally sweeter). For tofu, add 1 tbsp cornstarch to thicken the sauce further. The sticky-sweet profile pairs well with anything crispy or grilled!
Why did my sauce turn out too thin or too thick?
Thin sauce? Simmer uncovered for 5-10 more minutes to reduce. Too thick? Thin with 1 tsp water at a time. The key is patience—let it cool 10 minutes before adjusting. If it separates, whisk in 1 tsp cornstarch mixed with 1 tbsp cold water to stabilize it.
How long does this sauce keep, and can I freeze it?
Store in an airtight container in the fridge for up to 2 weeks. For freezing, portion into ice cube trays (great for single servings) or small jars. Thaw overnight in the fridge or microwave for 20 seconds on 50% power. The texture stays perfect—no weird separation!