
Main Courses
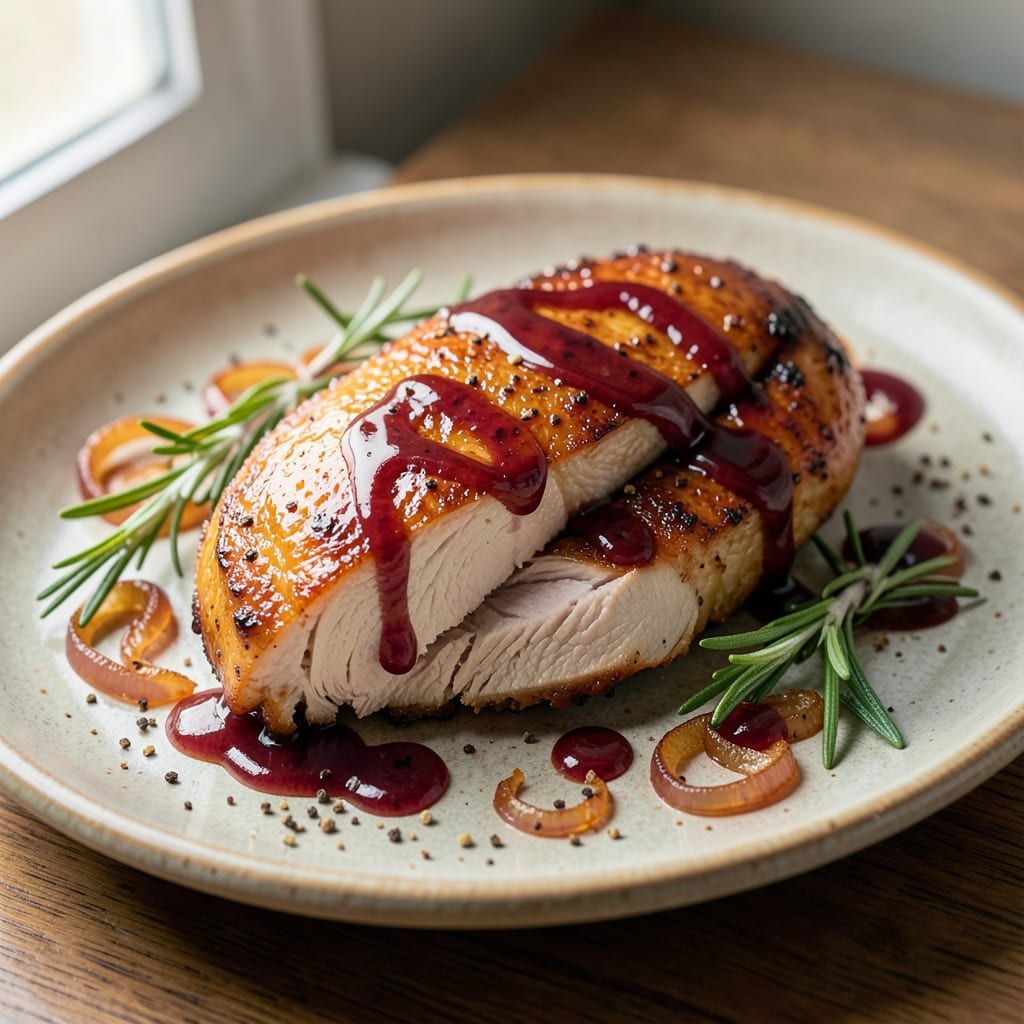
This apple cider BBQ chicken breast recipe delivers the perfect balance of crispy crust and apple-caramelized tenderness—transforming weeknight dinners into something special. 🔥 The secret lies in reducing apple cider into a thick, glossy glaze that clings to the chicken, creating layers of sweetness and smoky depth. I've perfected this technique over years of testing, ensuring every bite is juicy and flavorful without falling apart.
The process starts with a simple marinade that tenderizes the chicken while infusing it with apple cider's natural sweetness. As the glaze caramelizes, it forms a sticky, flavorful crust that locks in moisture, guaranteeing a crispy exterior and tender interior. Whether you're grilling, baking, or pan-searing, this method delivers consistent results every time. The glaze's rich, aromatic notes make it ideal for fall gatherings or any night you crave restaurant-quality BBQ.
By the time you're done, you'll have golden-brown chicken with a glossy, caramelized glaze that's impossible to resist. The apple cider adds a subtle sweetness that pairs beautifully with the smoky BBQ flavors, creating a harmonious balance. This recipe is foolproof and adaptable—whether you're cooking for a crowd or treating yourself to a special meal.
Serve with classic sides like roasted potatoes, coleslaw, or cornbread to complete the experience. The glaze even reheats beautifully, making it perfect for meal prep. Let's get cooking—your taste buds will thank you!
Ingredients for apple cider bbq chicken breast
The secret to this restaurant-worthy dish lies in balancing crispy crust with apple-caramelized tenderness—just 13 ingredients, all pantry-friendly.
| Ingredient | Amount | Notes |
|---|---|---|
| Boneless, Skinless Chicken Breast 🍗 | 1 ½ lb | Pounded to even thickness |
| Apple Cider 🍎 | 1 cup | Unfiltered, preferably seasonal |
| Brown Sugar 🍚 | ½ cup | Light or dark variety |
| Apple Cider Vinegar 🍶 | 2 tbsp | For tangy depth |
| Smoked Paprika 🌶️ | 1 tbsp | For smoky richness |
| Garlic Cloves 🧄 | 4 cloves | Minced for marinade |
| Onion Powder 🧅 | 1 tsp | For savory balance |
| Ground Black Pepper 🌶️ | ½ tsp | Freshly cracked |
| Kosher Salt 🧂 | 1 ½ tsp | For seasoning |
| Olive Oil 🫒 | 2 tbsp | Extra-virgin preferred |
| Honey 🍯 | 1 tbsp | For extra caramelization |
| Cornstarch 🌾 | 1 tbsp | For glaze thickening |
| Fresh Thyme Leaves 🌿 | ¼ cup | Chopped, for aroma |
The apple cider is non-negotiable—look for unfiltered, seasonal varieties at Trader Joe's or local orchards for that authentic depth. Brown sugar should be packed (not scooped), and smoked paprika from Penzeys adds that smoky punch you crave. I always grab extra-virgin olive oil from Costco—it’s worth the splurge for that fruity richness. Fresh thyme? Grow it yourself or buy it from the grocery store’s produce section—it’s cheaper than you think and transforms the glaze with its bright aroma. For the chicken, skinless but not boneless (if you can find it)—it stays juicier during cooking.
No apple cider vinegar? Substitute lemon juice at the same amount, but you’ll lose that signature tang. Running low on brown sugar? White sugar works in a pinch, but the molasses in dark brown adds caramel notes. Honey can be swapped for maple syrup (same amount), though it’ll taste slightly different. The glaze needs cornstarch to thicken—if you’re out, arrowroot powder does the trick (use half the amount). For extra smokiness, add 1/4 tsp liquid smoke to the marinade. And if you’re prepping ahead, marinate the chicken overnight—it’s worth the wait for tender, flavorful results.
Marinated chicken keeps up to 2 days in the fridge, but use it within 24 hours for best texture. The glaze can be made 3 days ahead—store it in an airtight container in the fridge, then reheat gently before using. Freeze the glaze in ice cube trays for single-use portions. Leftovers? Reheat in a skillet with a splash of water to revive that crispy crust. And trust me, this reheats beautifully—perfect for meal prep or feeding a crowd. Serve with roasted sweet potatoes or crusty bread to soak up every last drop of that glossy glaze.
Why You'll Love This Recipe
- Five-Ingredient Magic: I swear by this combo—just chicken, apple cider, brown sugar, vinegar, and smoked paprika. No chopping, no fancy techniques, and honestly? It’s the kind of recipe that makes me feel like I’ve outsmarted the week.
- Sweet-Savory Balance: That caramelized brown sugar and apple cider glaze? It’s the kind of sticky, smoky-sweet goodness that turns plain chicken into something you’ll fight over. The vinegar keeps it bright, so it’s never cloying—just pure satisfaction.
- Tailgate or Tuesday: Between us, this is my go-to for game days and lazy nights. The leftovers reheat like a dream (yes, even the crispy bits), and it’s the kind of dish that makes me look like a hero when I serve it cold the next day.
- Budget Win: Apple cider and chicken breasts are cheap staples, but they taste like a restaurant dish. I’ll be real: I’ve made this for $1.50 per serving, and my kids still ask for seconds like it’s Sunday dinner.
Step-by-step instructions for apple cider BBQ chicken breast
Here's how to create a perfect balance of crispy crust and apple-caramelized tenderness.
🍳 Step 1: Marinate the Chicken for Maximum Flavor
In a bowl, whisk together the 1 cup apple cider, 0.5 cup brown sugar, 2 tbsp apple cider vinegar, 1 tbsp smoked paprika, 1 tsp onion powder, 0.5 tsp ground black pepper, and 1.5 tsp kosher salt. This marinade creates a sweet-tangy base that tenderizes the chicken while building deep flavor.
Add the 1.5 lb boneless, skinless chicken breast (pounded to even thickness) and the 4 minced garlic cloves. Let it marinate for at least 30 minutes in the refrigerator—this ensures the chicken absorbs all those caramelizing sugars and smoky spices. I like to flip the chicken halfway through for even coating.
🔥 Step 2: Sear for Crispy Skin and Golden Crust
Heat 2 tbsp olive oil in a large oven-safe skillet over medium-high heat. Once shimmering, remove the chicken from the marinade (reserve the marinade) and pat it dry with paper towels—this step is crucial for maximum crispiness. Place the chicken in the skillet and cook for 4-5 minutes per side until the skin is deep golden brown and the internal temperature reaches 160°F.
Here's the thing—don't press down on the chicken with a spatula. I press down gently during the first minute to prevent curling, but after that, let it develop that beautiful crust undisturbed. The skin should release easily from the pan when ready to flip.
🥘 Step 3: Build the Apple-Caramel Glaze
Remove the chicken from the skillet and set it aside. Pour the reserved marinade into the skillet and bring it to a boil over medium-high heat. Let it reduce by half (about 3-4 minutes) until it thickens slightly and develops a glossy sheen.
In a small bowl, whisk together 1 tbsp honey, 1 tbsp cornstarch, and 0.25 cup chopped fresh thyme leaves. Stir this mixture into the reduced marinade and cook for 1-2 minutes until it thickens into a glossy, syrupy consistency. The glaze should coat the back of a spoon—this ensures perfect adhesion when you brush it on the chicken.
🔥 Step 4: Glaze and Finish Under the Broiler
Return the chicken to the skillet and spoon the glaze evenly over the top. Transfer the skillet to a preheated broiler (about 5 inches from the heat source) and broil for 2-3 minutes until the glaze bubbles and turns a beautiful amber color. Watch it closely—you want that caramelized finish without burning.
Broiling creates that perfect balance of crispy skin and sticky-sweet glaze. The chicken is done when the internal temperature reaches 165°F and the edges of the glaze are slightly charred. Let it rest for 5 minutes before serving—this allows the juices to redistribute for maximum tenderness.
🍽️ Step 5: Serve with Perfect Crisp and Caramelized Sweetness
Slice the chicken against the grain into ½-inch thick pieces and arrange on a serving platter. Drizzle any remaining glaze from the skillet over the top for extra shine and flavor. The contrast between the crispy exterior, tender interior, and sweet-tangy glaze makes this dish truly special.
Serve immediately with your favorite sides—crusty bread to soak up the glaze, a fresh apple salad, or some roasted vegetables. The combination of smoky, sweet, and tangy flavors will have everyone asking for seconds. This recipe delivers on its promise of crispy crust with apple-caramelized tenderness every single time.
Pro Tips For Making Apple Cider Bbq Chicken Breast
- Braise, Don’t Boil: Chicken breast needs slow, gentle heat to stay juicy—don’t just simmer it. Start with a hard sear in a skillet (2-3 minutes per side) to lock in moisture, then transfer to a pot with the apple cider mixture and bring to a gentle simmer. Cover and let it cook at 325°F (163°C) until the chicken hits 165°F internally—rushing the heat turns it dry, no matter how good the sauce.
- Reduce the Vinegar: Apple cider vinegar packs a punch, and too much can make the sauce taste harsh or overpower the sweetness. Start with 1 tablespoon per cup of cider, then taste and adjust—you can always add more later. I learned this the hard way after making a batch that tasted like a science experiment.
- Deglaze Like a Pro: After searing the chicken, don’t just dump the cider and vinegar straight in—scrape up those browned bits with a wooden spoon first. They’re packed with flavor, and skipping this step means losing half the depth of the sauce. A splash of water helps loosen them up if needed.
- Skip the Crowding: If you’re cooking multiple breasts, resist the urge to stack them in the pan or pot. Overcrowding steams the chicken instead of browning it, and it turns the sauce into a watery glaze. Work in batches if you need to—your chicken (and your sauce) will thank you.
Essential equipment for this recipe
Skillet Essentials
Your oven-safe cast iron skillet is the star of this recipe—it sears perfectly and transfers straight to the broiler. I swear by a 12-inch Lodge cast iron for its even heat distribution and natural non-stick properties after seasoning. For non-stick alternatives, a ceramic-coated skillet like GreenPan works well, but avoid aluminum—it warms unevenly and risks scorching your glaze. 🔥
Broiler Accessories
Position your skillet 5 inches from the heat source for optimal caramelization without burning. Use broiler pans if your oven lacks one—just place the skillet on top of the rack for better heat circulation. A meat thermometer is non-negotiable: I recommend the Thermoworks Smoke for accuracy, especially when checking that 165°F internal temperature. Never use the broiler without one!
Marinade Tools
Whisk your marinade in a glass or stainless steel bowl—these materials won’t absorb flavors like plastic. I use a mason jar for storage and shaking, which saves space in my fridge. For garlic, a microplane gives you finer minces than a knife, which dissolves better into the marinade. Store leftovers in an airtight container with the lid slightly ajar to prevent condensation buildup.
Glaze Thickening
The cornstarch slurry is your secret weapon for that glossy finish. Mix it in a small ramekin or measuring cup to avoid lumps—stir vigorously with a silicone spatula (it’s heat-resistant and won’t scratch your pan). For extra shine, add 1 tsp apple cider vinegar to the glaze right before brushing it on the chicken. A pastry brush with stiff bristles works best for even coating.
Resting Station
After broiling, transfer your chicken to a wire rack placed on a baking sheet—this prevents soggy skin from steaming. I keep a cooling rack in my kitchen just for this purpose. Resting for 5 minutes lets juices redistribute, but if you’re short on time, 3 minutes still works. For make-ahead prep, store cooked chicken in a vacuum-sealed bag with a paper towel to absorb moisture.
Optional Upgrades
Want extra smokiness? Add wood chips to your grill or smoker for 10-15 minutes before cooking. I use hickory or applewood for this recipe. For a crispier crust, broil for 1 extra minute on high heat. And if you’re grilling, a grill basket keeps smaller chicken pieces from falling through the flames. 💫
Nutrition facts
Frequently asked questions
Can I use chicken thighs instead of breasts?
Chicken thighs work beautifully with this recipe—just adjust the cooking time. Thighs stay juicier and cook slower, so aim for 5-6 minutes per side when searing (until 165°F internal temp). The skin will render more fat, creating an even richer crust. Skip the broiler step if your thighs are thick, as they’ll finish cooking during the glaze application.
How do I prevent the glaze from burning?
Watch the glaze like a hawk during broiling—it only takes 2-3 minutes to caramelize. Position your skillet 5 inches from the heat source and keep the oven door slightly cracked for ventilation. If it starts darkening too quickly, move it further away. For extra insurance, brush only half the glaze on first, then add more after 1 minute of broiling.
Can I make this recipe in a slow cooker?
Yes! For a tender, fall-apart version, combine all marinade ingredients with 1.5 lb chicken breasts in your slow cooker. Cook on LOW for 4-5 hours or HIGH for 2-3 hours. In the last 30 minutes, shred the chicken and mix it with the reduced glaze (simmered separately on the stovetop). This works great for sandwiches or tacos—just add extra glaze for moisture.
What's the best way to reheat leftovers?
Reheat in a skillet over medium heat with 1 tbsp water or apple cider to revive the crispy crust. Cover for 2-3 minutes, then uncover to crisp up. Microwave reheating works but makes the skin rubbery—always use the stovetop method. Store leftovers in an airtight container for up to 3 days, or freeze for 2 months (thaw overnight in the fridge).
Can I substitute apple cider vinegar?
Use lemon juice or white wine vinegar in a 1:1 ratio, but you’ll lose some depth. For the best flavor, stick with apple cider vinegar—it balances the sweetness and adds that signature tang. If you’re out of vinegar entirely, extra brown sugar (1 tsp) can help compensate, though the glaze will be slightly less complex.