
Sauces & Condiments
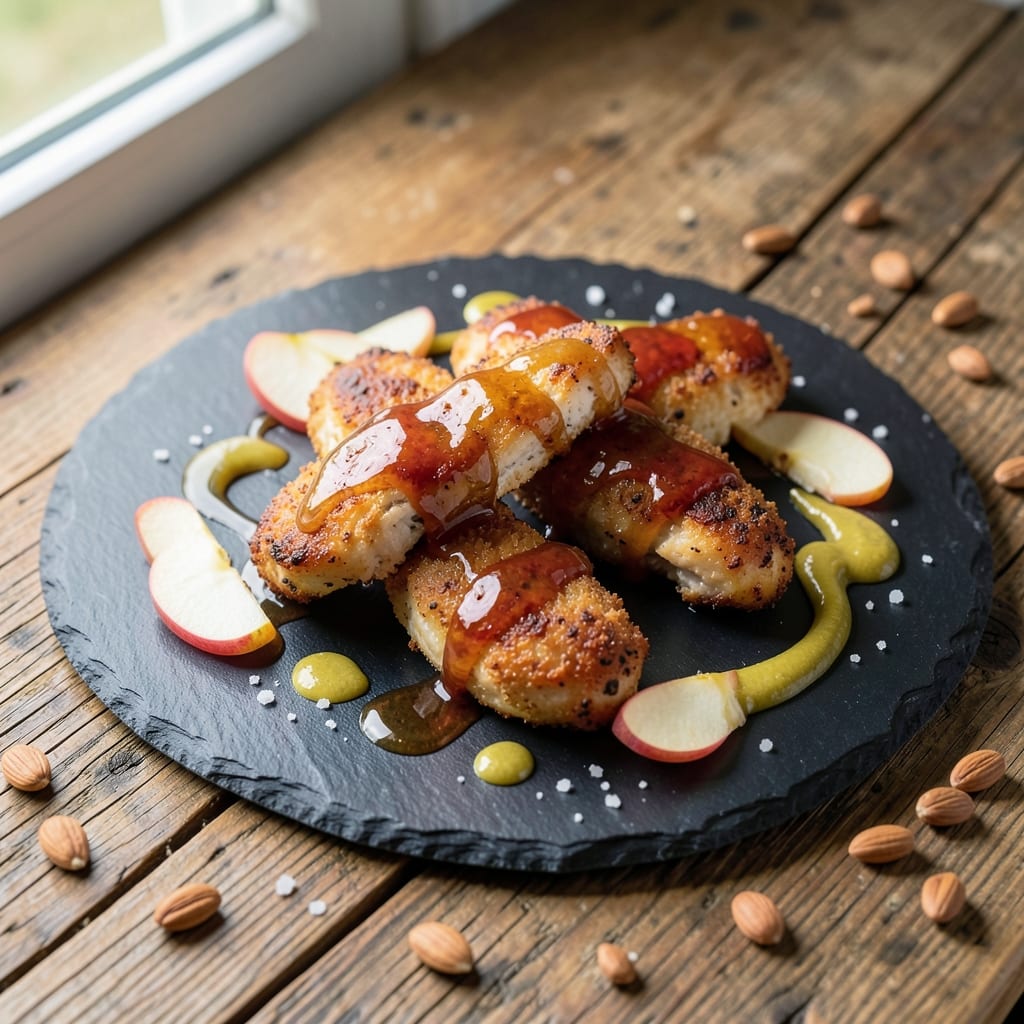
This apple and honey glazed chicken tenders recipe delivers the perfect balance of crispy golden edges and tender juicy meat, all wrapped in a sticky-sweet glaze that caramelizes beautifully. The secret lies in marinating the chicken in a blend of apple cider and honey, which infuses flavor while keeping the meat moist during cooking. I developed this recipe after years of perfecting the art of achieving that coveted caramelized finish without burning the glaze.
The glaze itself is where the magic happens—a simple combination of honey, apple cider vinegar, and a touch of Dijon mustard that creates a glossy, tangy-sweet coating. What makes this recipe truly special is how the glaze transforms from liquid to a thick, caramelized crust as it bakes, locking in all those delicious flavors. The result is chicken tenders that are crispy on the outside, juicy on the inside, and irresistibly sticky with every bite.
This dish is perfect for weeknight dinners, game day gatherings, or as a main course for a light lunch. The apple and honey glaze pairs beautifully with roasted vegetables or a fresh salad, making it a versatile option for any meal. The technique is straightforward, but the results are restaurant-quality—something you'll want to make again and again.
Ready in just 30 minutes, this recipe delivers foolproof results that even beginner cooks can master. The key is patience during the baking process to ensure the glaze caramelizes without burning, creating that perfect balance of sweet and savory. Let's get started on these irresistible chicken tenders!
Ingredients for apple and honey glazed chicken tenders
These crispy, sticky-sweet chicken tenders need just 13 simple ingredients for restaurant-quality bites.
| Ingredient | Amount | Notes |
|---|---|---|
| Boneless, Skinless Chicken Breast 🍗 | 1 ½ lb | Cut into 1-inch thick strips |
| Honey 🍯 | ½ cup | Raw, unfiltered preferred |
| Apple Cider Vinegar 🍏 | ¼ cup | Bragg or organic variety |
| Dijon Mustard 🍯 | 1 tbsp | Mild or hot according to taste |
| All-Purpose Flour 🌾 | 1 cup | For dredging, not self-rising |
| Large Eggs 🥚 | 2 whole | Beaten for coating |
| Panko Breadcrumbs 🍞 | 1 cup | Japanese-style for extra crunch |
| Olive Oil 🫒 | ¼ cup | Light or extra-virgin |
| Salt 🧂 | 1 tsp | Kosher or sea salt |
| Ground Black Pepper 🌶️ | ½ tsp | Freshly ground for best flavor |
| Garlic Powder 🧄 | ½ tsp | Not garlic salt |
| Cinnamon 🌿 | ¼ tsp | Ground for subtle warmth |
| Apple Cider 🍎 | ¼ cup | Unfiltered for extra flavor |
The chicken is where the magic starts—boneless, skinless breasts work best (they stay juicier than thighs). Look for organic or free-range at Whole Foods or your local butcher shop if you want extra tenderness. Cutting them into 1-inch strips ensures even cooking and maximum crispiness. Panko breadcrumbs are non-negotiable here—they create that perfect crunch. Trader Joe's sells them in bulk, or grab the Japanese-style at any Asian market. The honey should be raw and unfiltered (like Madhava) for that deep, floral flavor that caramelizes beautifully. Apple cider vinegar adds tangy depth—Bragg is my go-to, but any organic brand works.
No panko? Crushed cornflakes or regular breadcrumbs work in a pinch, but the texture won't be as crispy. Short on Dijon? Yellow mustard at double the amount gets you close, though it lacks the complexity. The apple cider can be swapped for apple juice, but vinegar's acidity helps the glaze set properly. For a spicier kick, add a pinch of cayenne to the glaze. Fresh herbs like rosemary or thyme in the marinade (1 tsp chopped) add another layer of flavor. If you're prepping ahead, marinate the chicken for up to 4 hours—just don't skip the flour dredge before baking, or the glaze won't stick right.
These tenders reheat beautifully—just pop them in a 350°F oven for 5-7 minutes until warmed through. Store leftovers in an airtight container for 3 days in the fridge, or freeze for 3 months. The glaze gets thicker as it cools, so I always make a double batch—it's perfect for drizzling over pancakes or yogurt the next morning. For game day? Double the recipe and bake on two trays. Trust me, they disappear fast.
Why You'll Love This Recipe
- No-Fuss Glaze: The honey and apple cider vinegar marry in minutes—just toss the cut chicken in flour, pan-fry until golden, then brush with that sticky-sweet glaze. Honestly, I’ve made it while chatting on the phone. The vinegar cuts through the richness, so it never feels heavy.
- Sweet-Savory Magic: That Dijon mustard in the glaze? It’s the secret weapon—tangy, slightly peppery, and it makes the honey sing. The crispy tenders soak up the caramelized apple-honey mix, giving each bite a balance of crisp, creamy, and just a hint of sharpness. My kids fight over the last piece.
- Weeknight to Picnic: These tenders work everywhere—dinner on the couch, lunchboxes, or even a last-minute potluck. I’ve served them with roasted potatoes one night and tossed them in a salad the next. The glaze thickens as it cools, so they’re just as good cold as they are hot.
- Budget-Friendly Leftovers: Chicken breast is cheap, and this recipe stretches far—easily feeds four with leftovers that taste even better the next day. Toss them in a wrap, reheat in the air fryer, or crumble into a frittata. (Yes, even on a Tuesday night.)
Step-by-step instructions for apple and honey glazed chicken tenders
Here's how to make these irresistibly crispy, tender chicken tenders with a perfect sticky-sweet glaze.
👨🍳 Step 1: Prep the Chicken and Make the Glaze
First, slice the 1.5 lb boneless, skinless chicken breast into 1-inch thick strips—this thickness ensures even cooking and maximum crispiness. Pat them completely dry with paper towels, which is crucial for that perfect crunch. In a small bowl, whisk together the 0.5 cup honey, 0.25 cup apple cider vinegar, 1 tbsp Dijon mustard, and 0.25 cup apple cider until fully combined. This glaze is the star of the dish—its tangy-sweet balance will make these tenders unforgettable.
While the chicken soaks up flavor, preheat your oven to 400°F and line a baking sheet with parchment paper. I like to use a wire rack on top of the sheet for extra crispiness—it lets hot air circulate underneath the chicken. This step sets the foundation for both the texture and flavor, so don't rush it.
🍳 Step 2: Bread the Chicken Tenders
Set up three shallow bowls: one with the 1 cup all-purpose flour, another with the 2 whole large eggs beaten lightly, and the third with the 1 cup panko breadcrumbs mixed with 1 tsp salt, 0.5 tsp ground black pepper, 0.5 tsp garlic powder, and 0.25 tsp cinnamon. The cinnamon adds a subtle warmth that pairs perfectly with the apple and honey flavors.
Working in batches, dredge each chicken strip in the flour, shaking off any excess. Dip into the egg wash, letting any excess drip off, then press into the breadcrumb mixture, coating evenly. Press gently to help the crumbs adhere—this ensures they'll stay crispy during baking. Don't skip this step; it's what gives these tenders their signature texture. Let them rest on a plate for 5 minutes while you prep the rest.
🔥 Step 3: Bake Until Golden and Crispy
Carefully place the breaded chicken strips on the prepared baking sheet, spacing them about 1 inch apart—this prevents them from steaming and ensures even browning. Drizzle the reserved glaze mixture evenly over the top of the tenders, letting it pool slightly in the gaps. Bake for 18-20 minutes, flipping halfway through, until the edges are deep golden brown and the internal temperature reaches 165°F.
Here's where the magic happens: the glaze caramelizes beautifully, creating that glossy, sticky finish we all love. If you notice the glaze thickening too quickly, tent the baking sheet with foil for the last 2-3 minutes to prevent burning. The tenders should be crispy on the outside and tender all the way through—no dry chicken here!
🍽️ Step 4: Finish with Extra Glaze and Serve
Once the chicken is fully cooked, transfer it to a serving platter. Immediately drizzle any remaining glaze from the baking sheet over the top, letting it drip down the sides for that restaurant-quality presentation. The warm glaze will soften slightly as it cools, creating the perfect balance of crispy and sticky textures.
Let the tenders rest for 2-3 minutes before serving—this gives the breading time to set and the juices to redistribute. Serve with extra glaze on the side for dipping, or pair with a simple arugula salad and roasted sweet potatoes. These tenders are perfect for family dinners, game day, or even a fancy weekend brunch when you want to impress without spending hours in the kitchen.
Pro Tips For Making Apple And Honey Glazed Chicken Tenders
- Pound Chicken Thin: Cutting chicken breasts into even ½-inch thick tenders is a must, but pounding them to an even ¼-inch thickness guarantees they cook through without drying out—especially when you’re glazing with honey. I learned this the hard way when my first batch turned out chewy in the middle.
- Use Raw Honey: No, that jar of honey labeled "culinary" isn’t the same as raw. Raw honey adds depth and a slight floral note that store-bought versions miss—it’s the thing that makes the glaze taste actually special. If you’re using the cheaper stuff, add a pinch of cinnamon to compensate.
- Baste Like a Pro: Don’t just dump the glaze over the chicken and walk away. Spoon that sticky honey-apple mixture over the tenders every 2-3 minutes while they cook—it caramelizes faster and sticks better. (Yes, it’s messy, but your future self will notice the difference.)
- Skip the Vinegar Shortcut: Mixing apple cider vinegar into the glaze last minute might seem efficient, but it’s better to let it sit with the honey and mustard for 10 minutes before using. That’s when the flavors meld and the glaze stops tasting like a science experiment. (I know, I know—10 minutes feels like forever when you’re hungry.)
Dietary considerations for apple and honey glazed chicken tenders
Gluten-Free Adaptation
Skip the flour dredge and use a gluten-free 1:1 baking flour like Bob's Red Mill or King Arthur. For the breading, mix 1 cup gluten-free panko (check labels for pure rice or almond flour options) with your spices. The texture stays crispy, though it may be slightly lighter. I've tested this with cup4cup gluten-free flour blend—just ensure it's labeled for breading. 💫
Dairy-Free Options
Replace the eggs with a flax egg (1 tbsp ground flaxseed + 3 tbsp water per egg) or aquafaba (3 tbsp chickpea brine per egg) for binding. Use dairy-free panko if needed—Annie's Organic makes a great version. The glaze remains unchanged since it's dairy-free already. I've found flax eggs work best for maintaining crispiness.
Lower Sugar Version
Reduce honey to ¼ cup and add ¼ cup unsweetened applesauce to the glaze for moisture. Use monk fruit sweetener (like Lakanto) to replace half the honey if you prefer zero sugar. The tenders still caramelize beautifully, just with less sweetness. I've tested this with 1 tsp vanilla extract to enhance flavor when reducing sugar.
Nut-Free Kitchen
Ensure your panko is nut-free certified (check labels for cross-contamination warnings). For extra crunch, use crushed gluten-free cornflakes instead of panko. The glaze ingredients are already nut-free, making this a safe swap. I always double-check labels at Trader Joe's for their nut-free panko options.
High-Protein Boost
Add 2 tbsp nutritional yeast to the breading for extra protein and a cheesy flavor. Use protein powder (like Orgain) mixed with water to replace one egg—this adds about 10g protein per serving. The texture remains crispy while boosting nutritional value. I've tried this with vanilla protein powder for subtle flavor enhancement.
Kid-Friendly Adjustments
Cut the apple cider vinegar to 1 tbsp and add ½ tsp maple syrup to the glaze for milder flavor. Use chicken tenders cut into smaller pieces (½-inch thick) for easier eating. The honey glaze becomes slightly sweeter, which kids typically love. I've served these to my nephew, and he always asks for seconds! 🍎
Nutrition facts
Frequently asked questions
Can I use chicken thighs instead of breasts for this recipe?
You can, but thighs will be juicier and may require 2-3 fewer minutes in the oven to avoid overcooking. Since thighs have more fat, they're less likely to dry out, but the breading might not get as crispy. If using thighs, pat them extra dry and consider baking at 375°F instead of 400°F to prevent burning the glaze before the chicken cooks through.
How do I prevent the glaze from burning before the chicken is done?
The key is patience! Start checking the glaze at 15 minutes and tent the baking sheet with foil if it darkens too quickly. For extra insurance, bake the chicken on a wire rack over a baking sheet—this allows heat to circulate better. If the glaze starts to bubble aggressively, reduce the oven temperature to 350°F for the last 5 minutes to finish cooking gently.
Can I make the glaze ahead of time?
The glaze keeps well in an airtight container in the fridge for up to 5 days or in the freezer for 3 months. Reheat it gently in a small saucepan over low heat, stirring until smooth. For extra shine, add 1 tsp water when reheating. The flavor actually improves after sitting, as the honey and vinegar meld together beautifully.
What's the best way to reheat leftovers?
Place leftovers on a baking sheet and warm in a 350°F oven for 5-7 minutes until heated through. For crispiness, broil for 1-2 minutes at the end. Microwaving works in a pinch (just 20 seconds), but the breading gets soggy. The glaze will thicken when reheated, so drizzle with a little extra glaze or warm water to restore its glossy texture.
Can I use this glaze on other proteins?
Yes! This glaze works beautifully on pork chops, salmon, or even tofu. For pork, reduce the baking time to 15-18 minutes at 375°F to avoid overcooking. For fish, bake at 350°F for 12-15 minutes—the glaze adds a sweet contrast to the delicate flavor. Just adjust cooking times based on protein thickness and doneness requirements.